
Project Honda Civic EK K20 // Build Breakdown:
If you’ve ever wondered what it takes to build a proper Civic EK K20 swap from the ground up, then this article is worth your while! For those of you that have been following us on social media, then you have probably seen several posts regarding the #projectekk20resurrection. Here is the full story!
How it all started.
In the past, our Blog series came to life with the true intentions to learn, express, and provide our own perspective of our builds. Most of the time, the “behind the scenes” version is a writing down of what happens during the making of our own or a customer project car. The process. The lows and highs of the scene.
It was always about execution. The same way in this case.
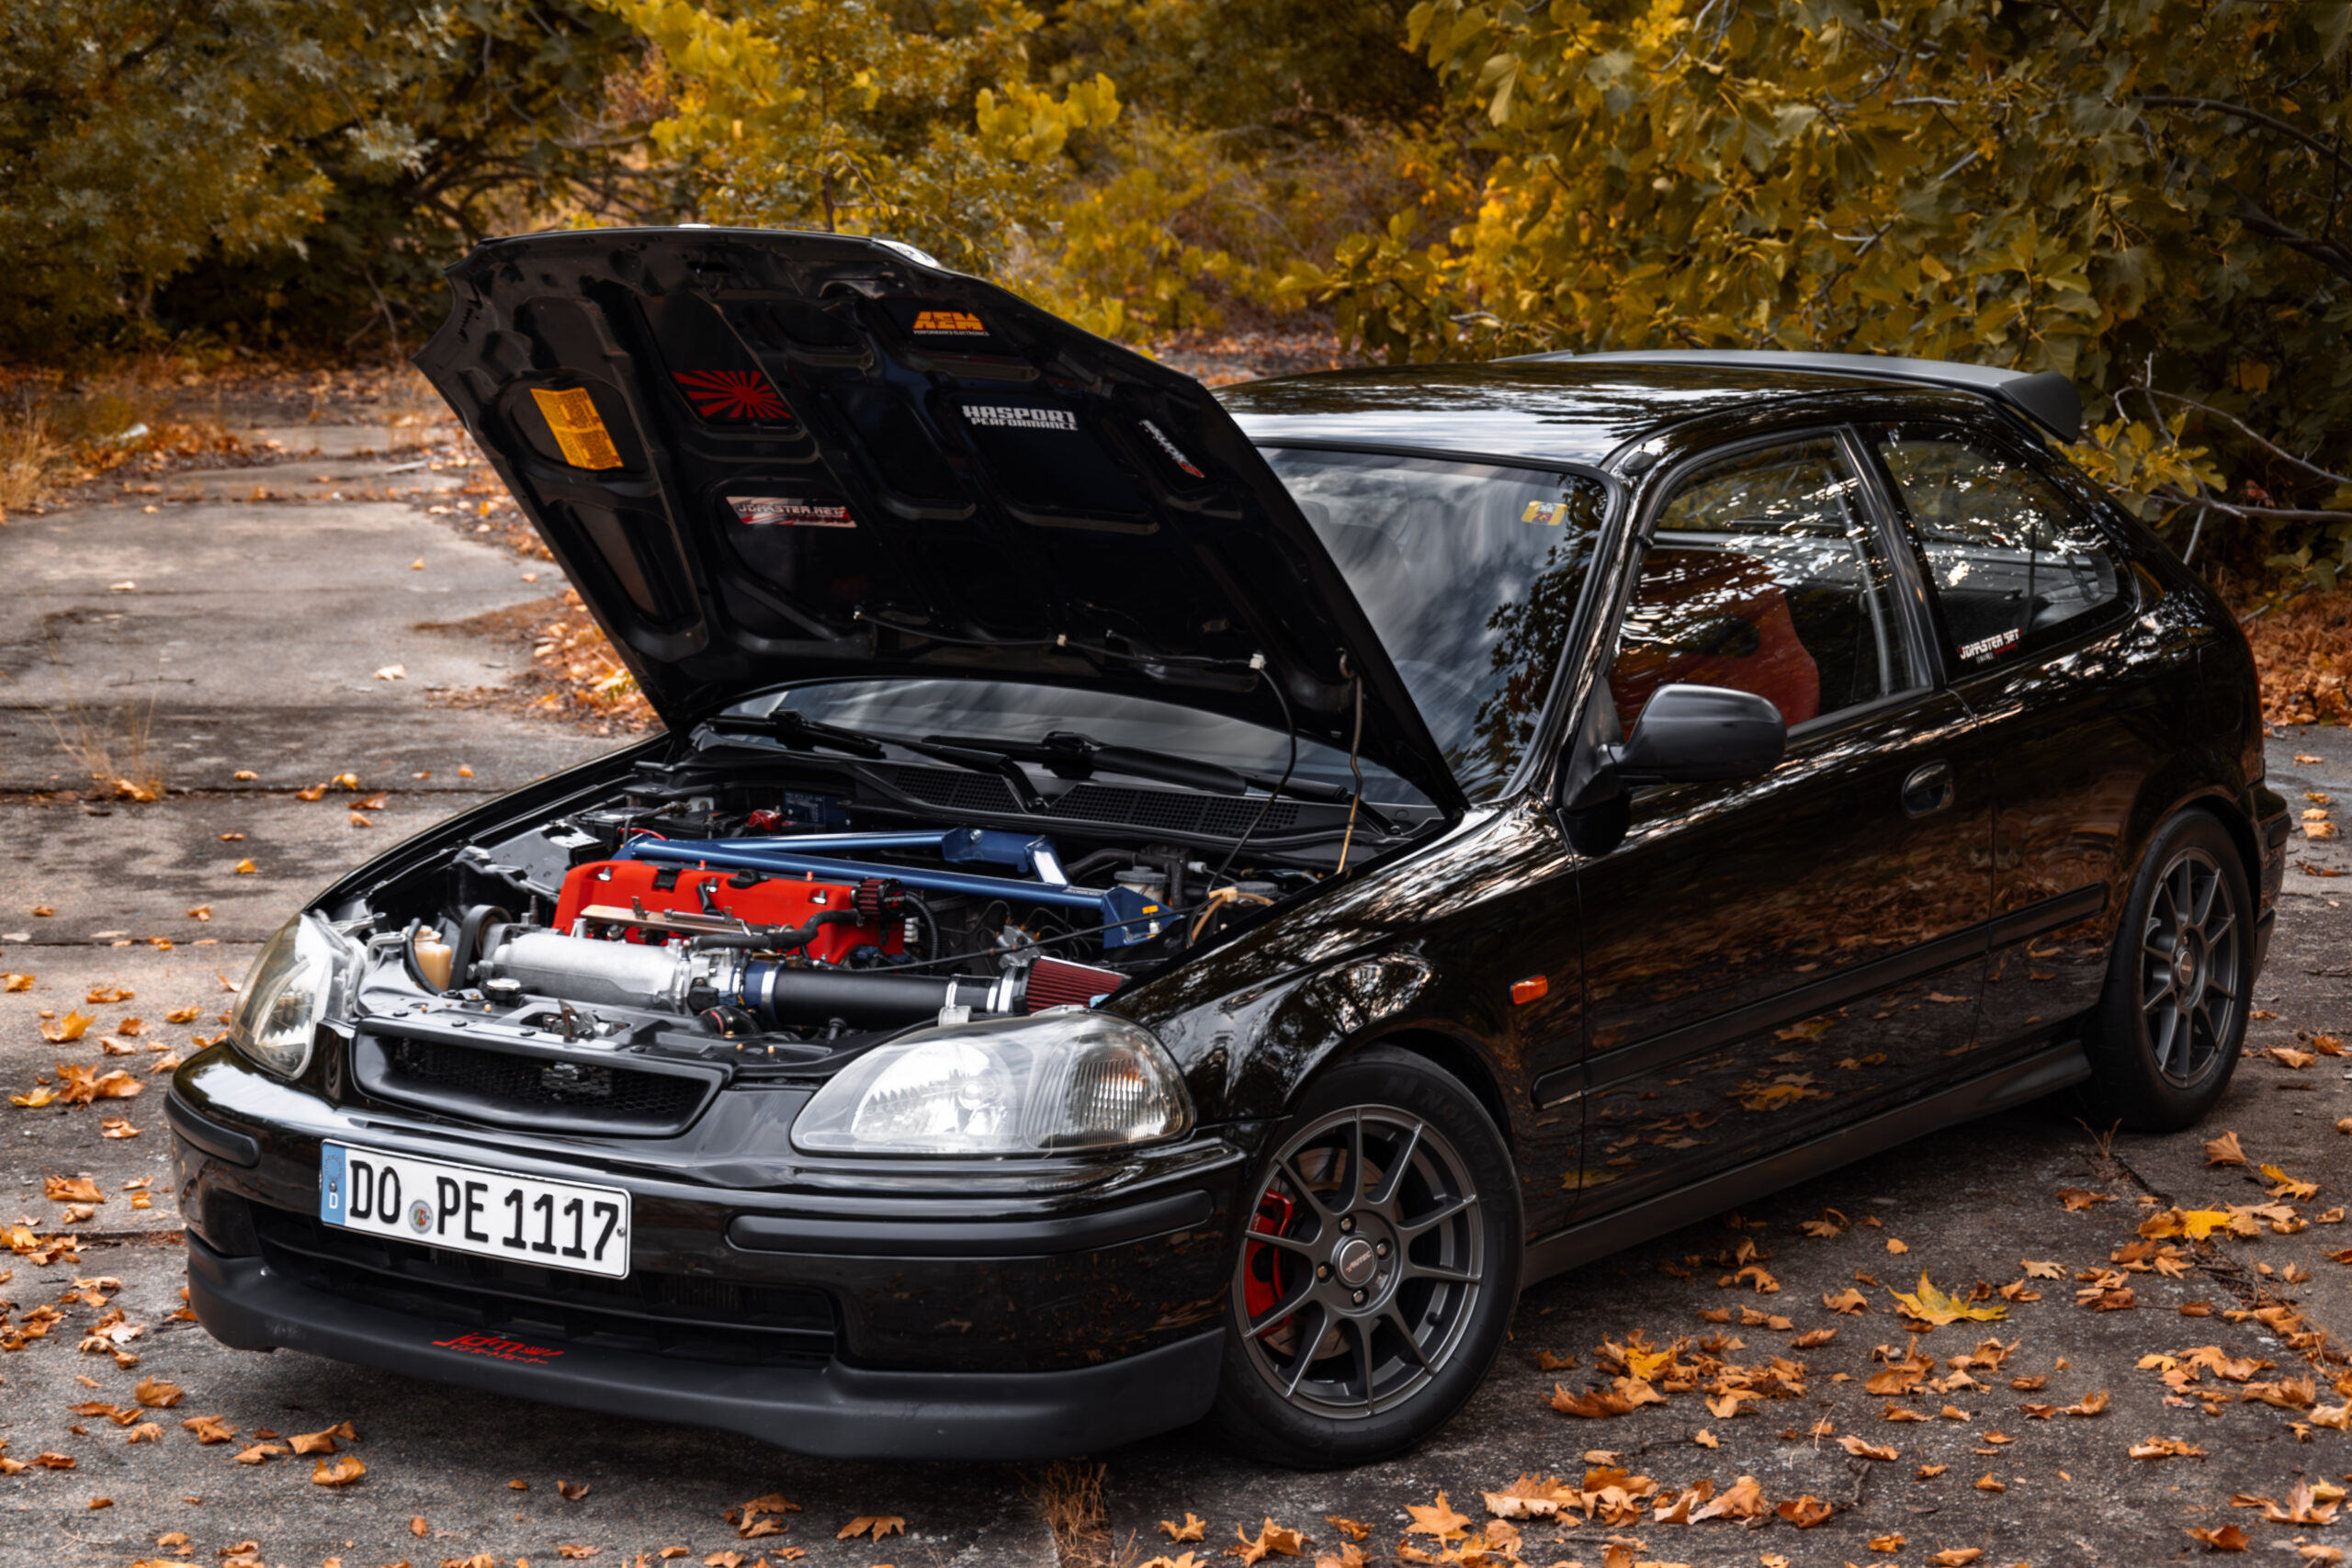
Our customer’s vision was to take a humble Civic EK and transform it, not into a replica, but to a car with it’s own purpose, built around the anticipated vibe of the EK9 Type R. Far from the real deal, but much closer to a realistic build up with real street and track usability.
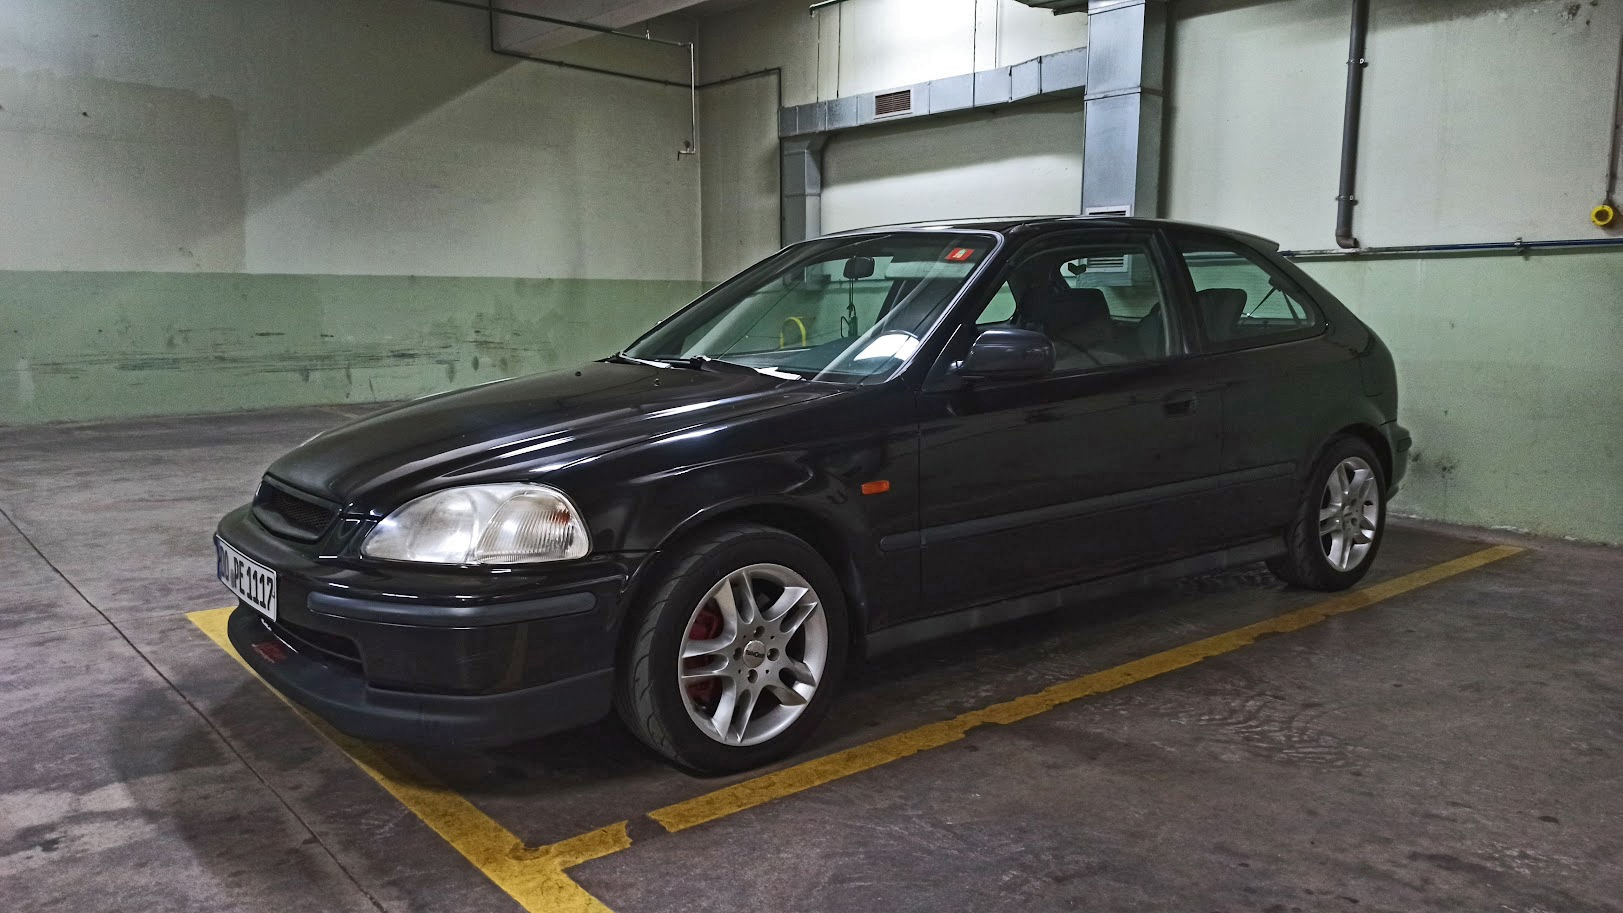
This was his first car, his first love and that little car that could do it all at once. But there was one problem. It lacked the power.
It all started with a base model 1998 Honda Civic EK (or EJ Civic if you are a chassis model specific nerd). A 1.4-liter D14 engine, basic trim, 3-door hatch. No extras, no luxury. But that was exactly the point. It was the perfect example of a clean base. Lightweight, functional, and ready to be transformed. That’s how most daily driven Civics start before they end up being more than a stock Civic!
Making a K-series engine swap !
For us, the K-series isn’t just an upgrade, it’s a smarter foundation for any serious Honda project moving forward.
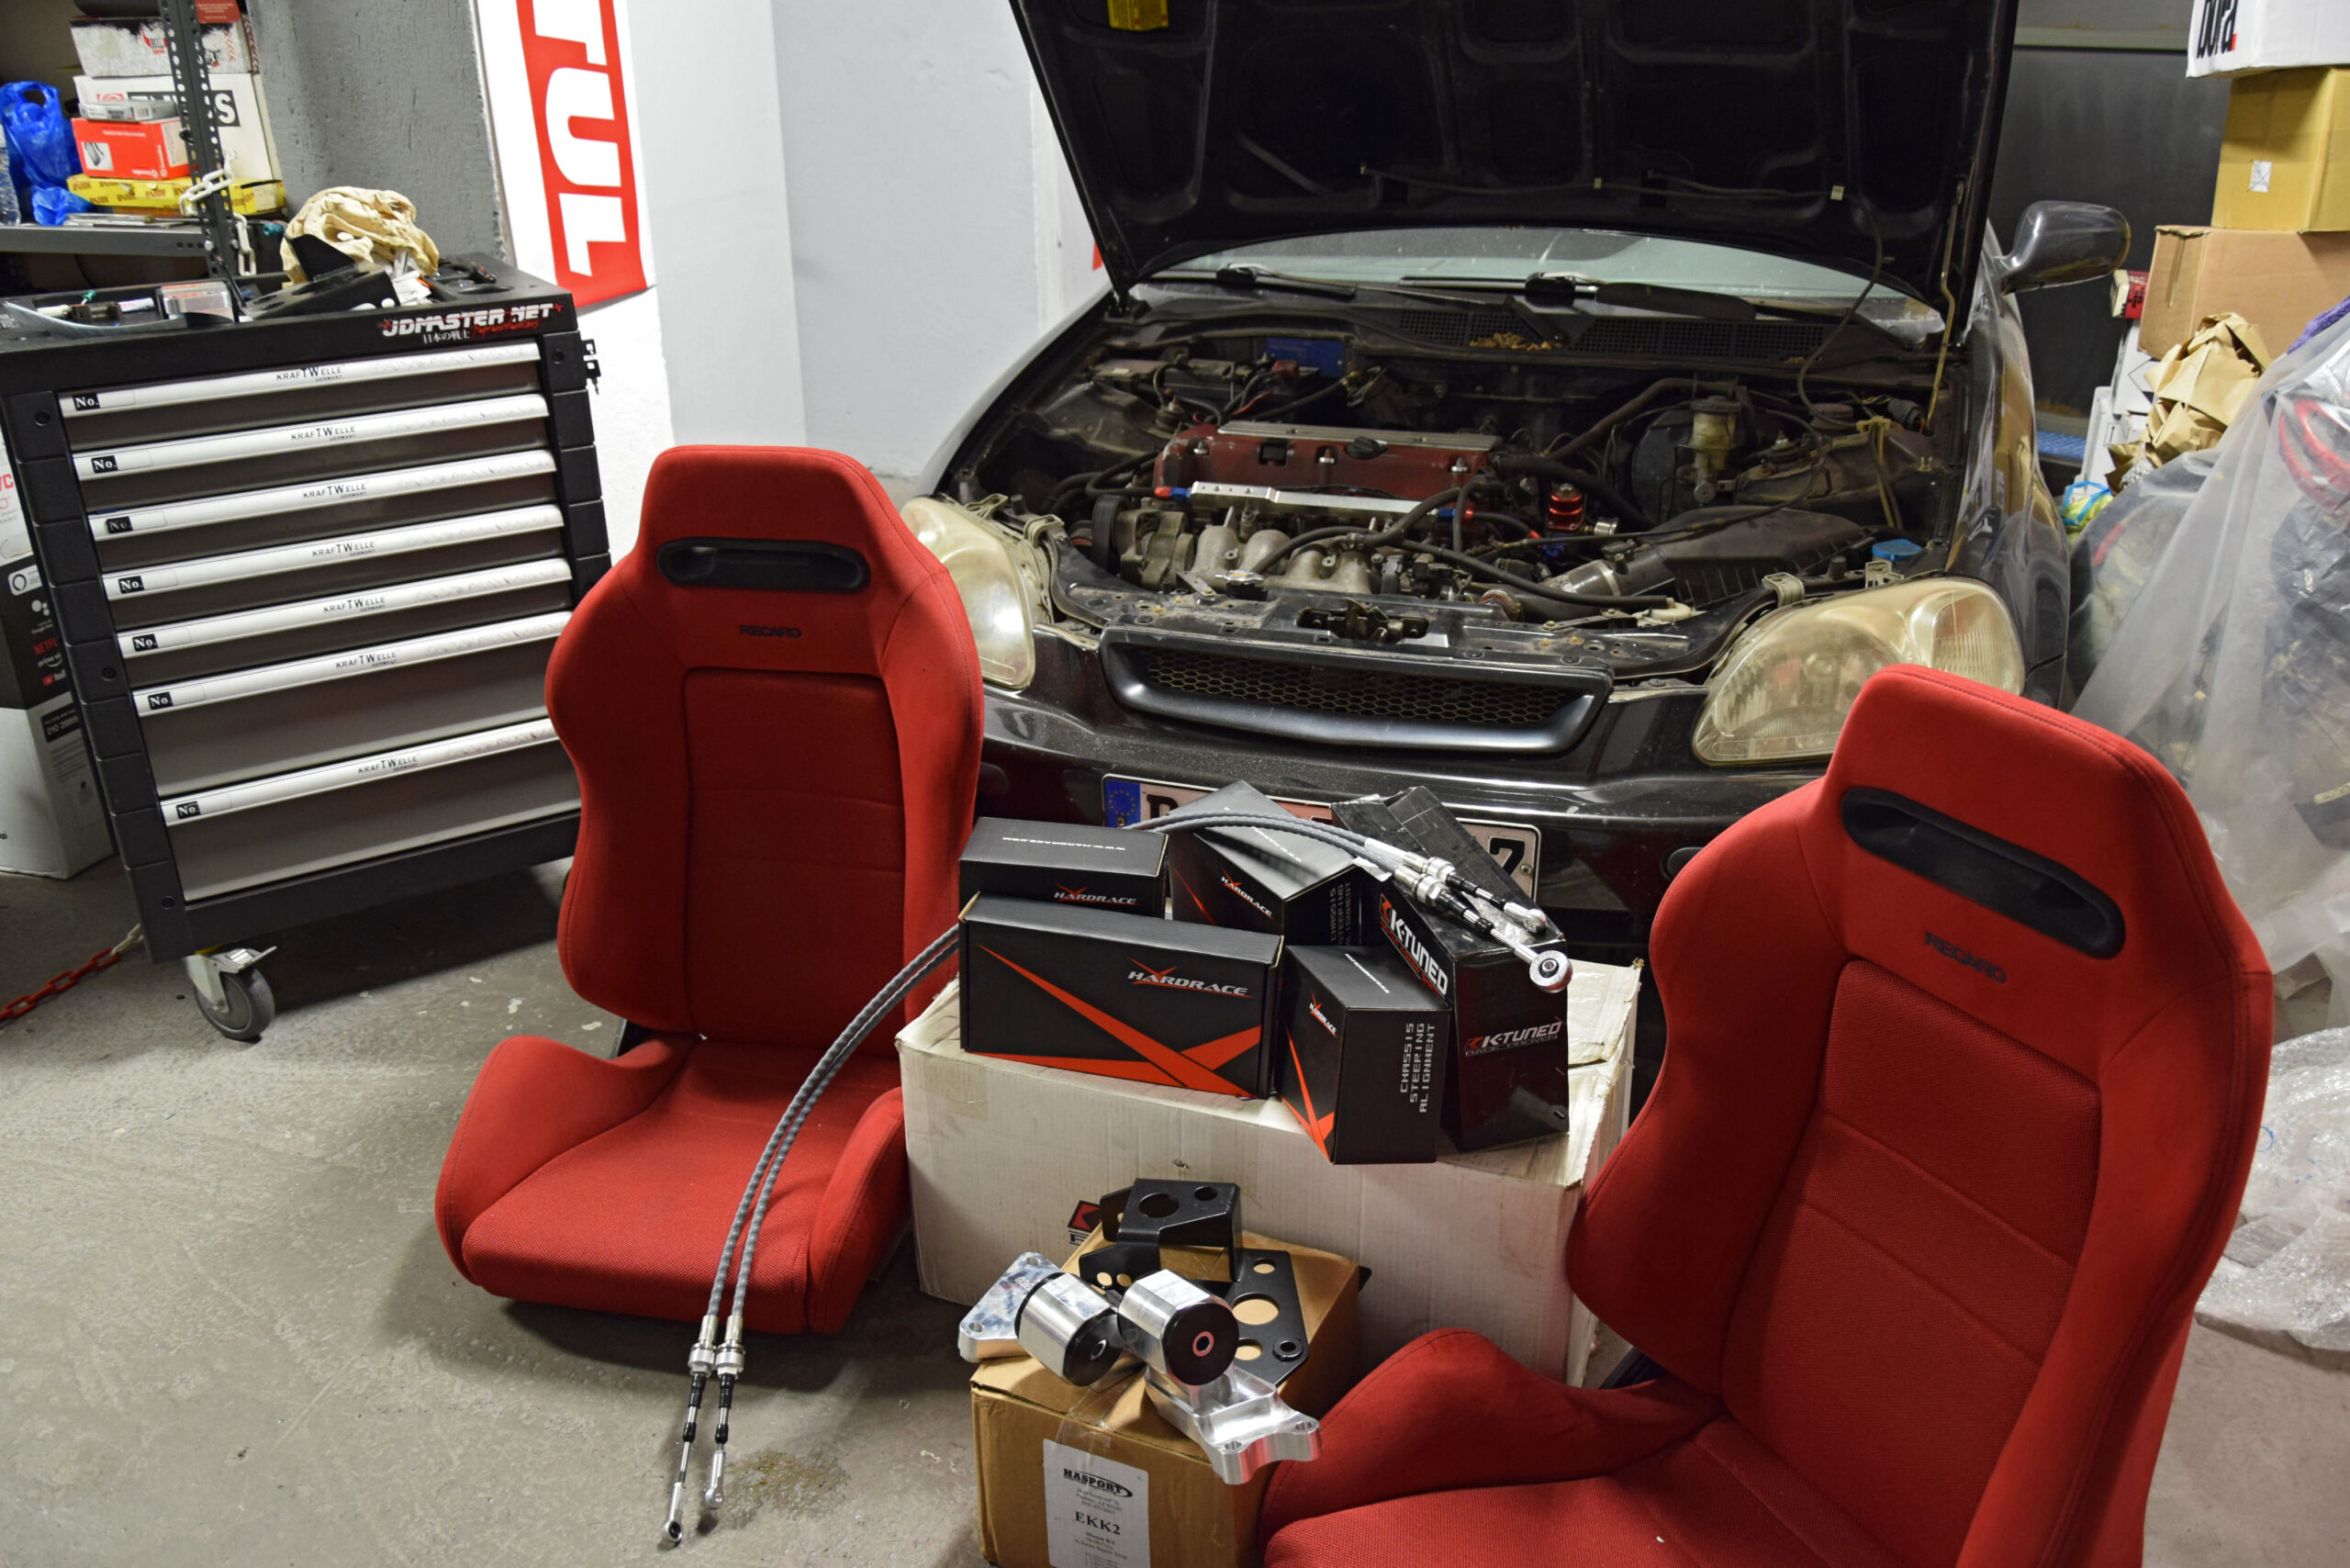
There’s no denying the appeal of the K20A2. Honda’s high-revving 2.0L DOHC i-VTEC engine is a standout in the world of naturally aspirated four-cylinders, and for good reason.
With its 86mm x 86mm square bore and stroke, the K20 offers an ideal balance between torque and rev happy response. It revs cleanly to 8,000 rpm and beyond, delivering power across the band while maintaining daily driveability. It’s no surprise that the K20 has become the gold standard for front-wheel drive performance and a favorite swap for track cars, time attack builds, and competitive hillclimb setups worldwide.
It turns the modest EK chassis into a sharp, responsive, and fun to drive car.
The initial swap on this chassis fell short of expectations, as it was combined with incorrect parts at the early stage.

The engine bay? Total chaos, in every aspect, which made the overall appearance kinda wonky. Other than that, we noticed the engine swap was missaligned due to incorrect engine mounts and several loose mounting points and wires.

That is exactly why it got delivered to JDMaster: To take care of everything regarding the engine bay, as well as, the remaining needs of the car. What we did was take it back to square one and rework everything properly.
The remake.
The owner’s request – other than a properly functional Kswap – was to achieve more than the factory 200ps.
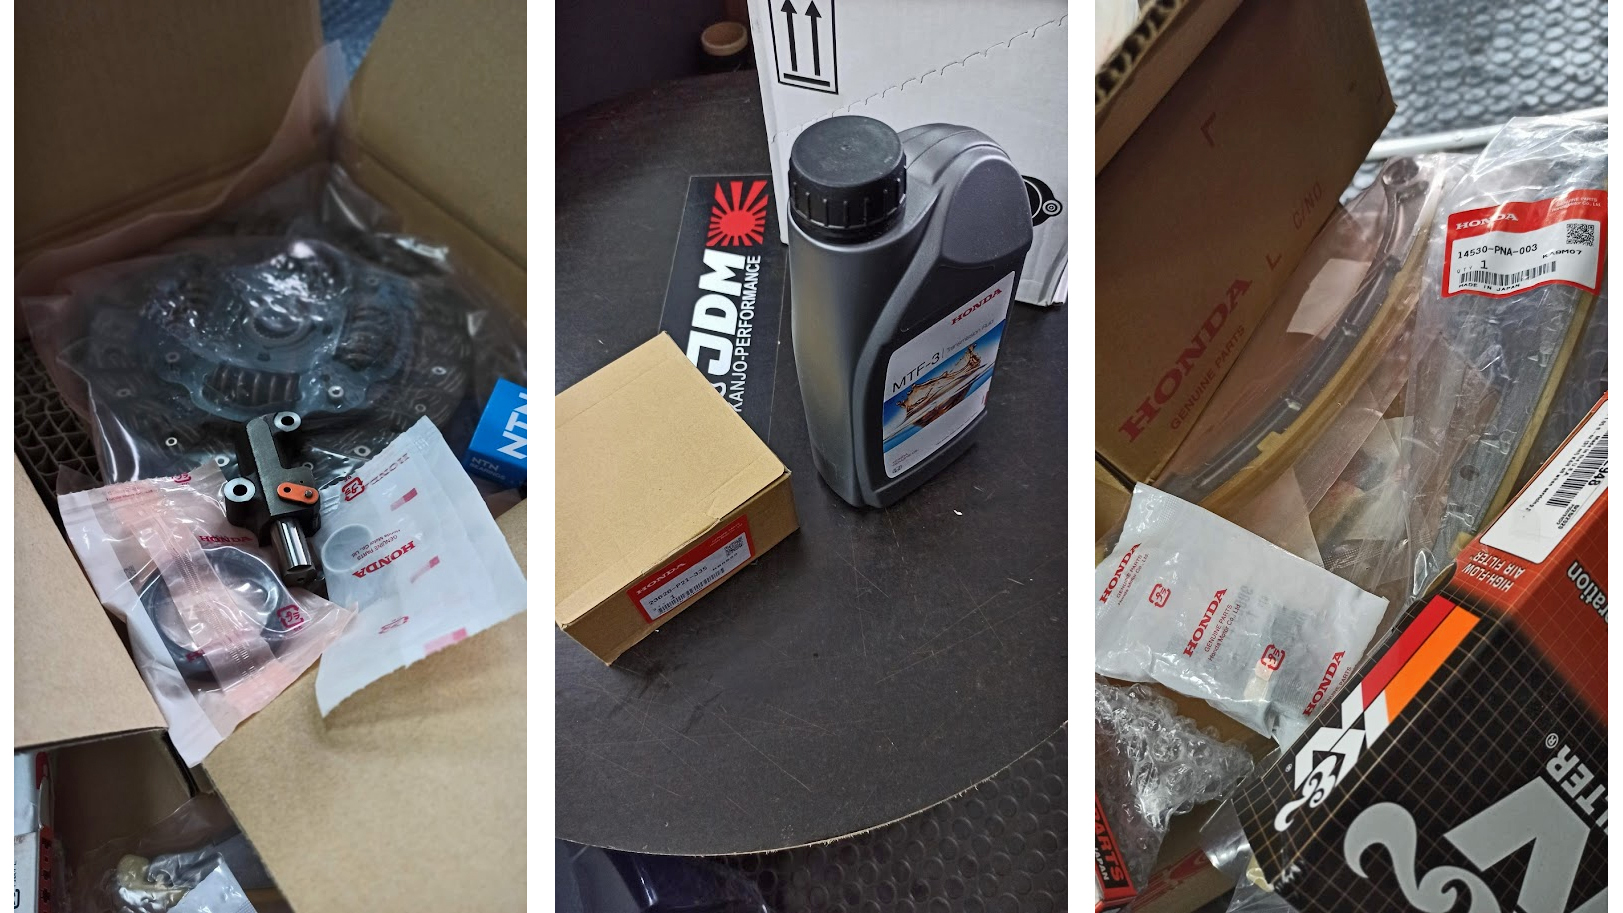
So while the necessary mods were being delivered, we were head first into a full engine service & maintenance. New, original Honda parts arrived to get the healthy engine swap back into the chassis. At the same time, we were installing the first modifications.

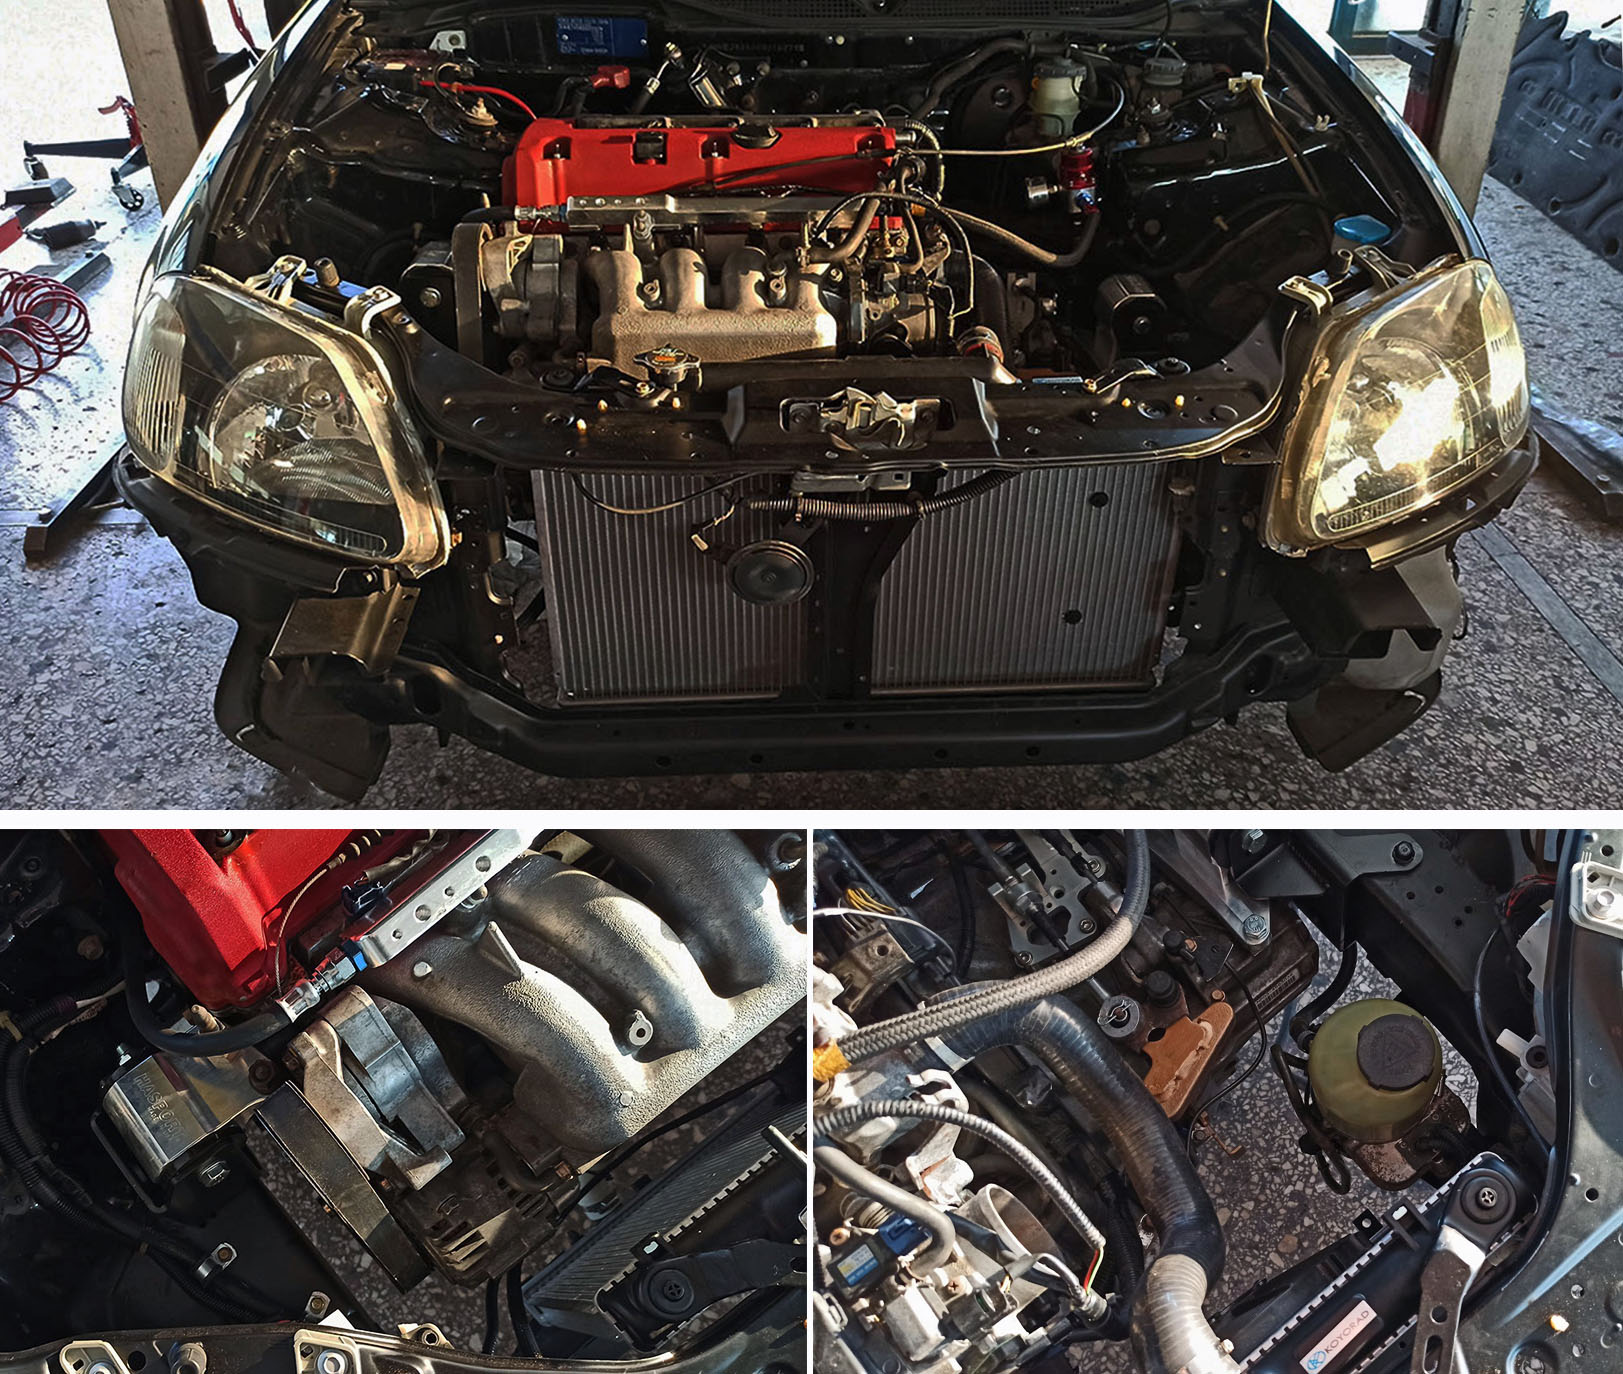
While the swap was out of the car, it was the perfect opportunity to make the first big step in the body of the car. We started by prepping the front end of the chassis, sorting out body rust and repainting most of the engine bay panels.

Mounting the swap.
We started by addressing the initial errors of the swap. One of those was the lack of proper engine mount kit.
When you want to properly align this swap into the Civic EK chassis, you need to follow some rules to make it right. The installation of the Civic EG 92-95 subframe, steering rack, and control arms is required.
All these parts are needed in order to replace the stock EK ones and have a proper engine swap balance and driveshafts alignment.


For a reliable and performance-oriented K-swap, engine mounts are critical. We chose Hasport EKK2 mounts, which are widely considered the benchmark for K-series into EK chassis conversions. Their design maintains proper axle geometry, reduces unwanted engine movement under load, and provides OE-level fitment with various stiffness levels depending on the type of use (in our case, 62A urethane for mixed use).
Another very important addition, for the driver, was the installation of the MR2 electrohydraulic steering pump unit which transformed the manual, heavy steering, into a light, flawless steering response.
Engine mods.
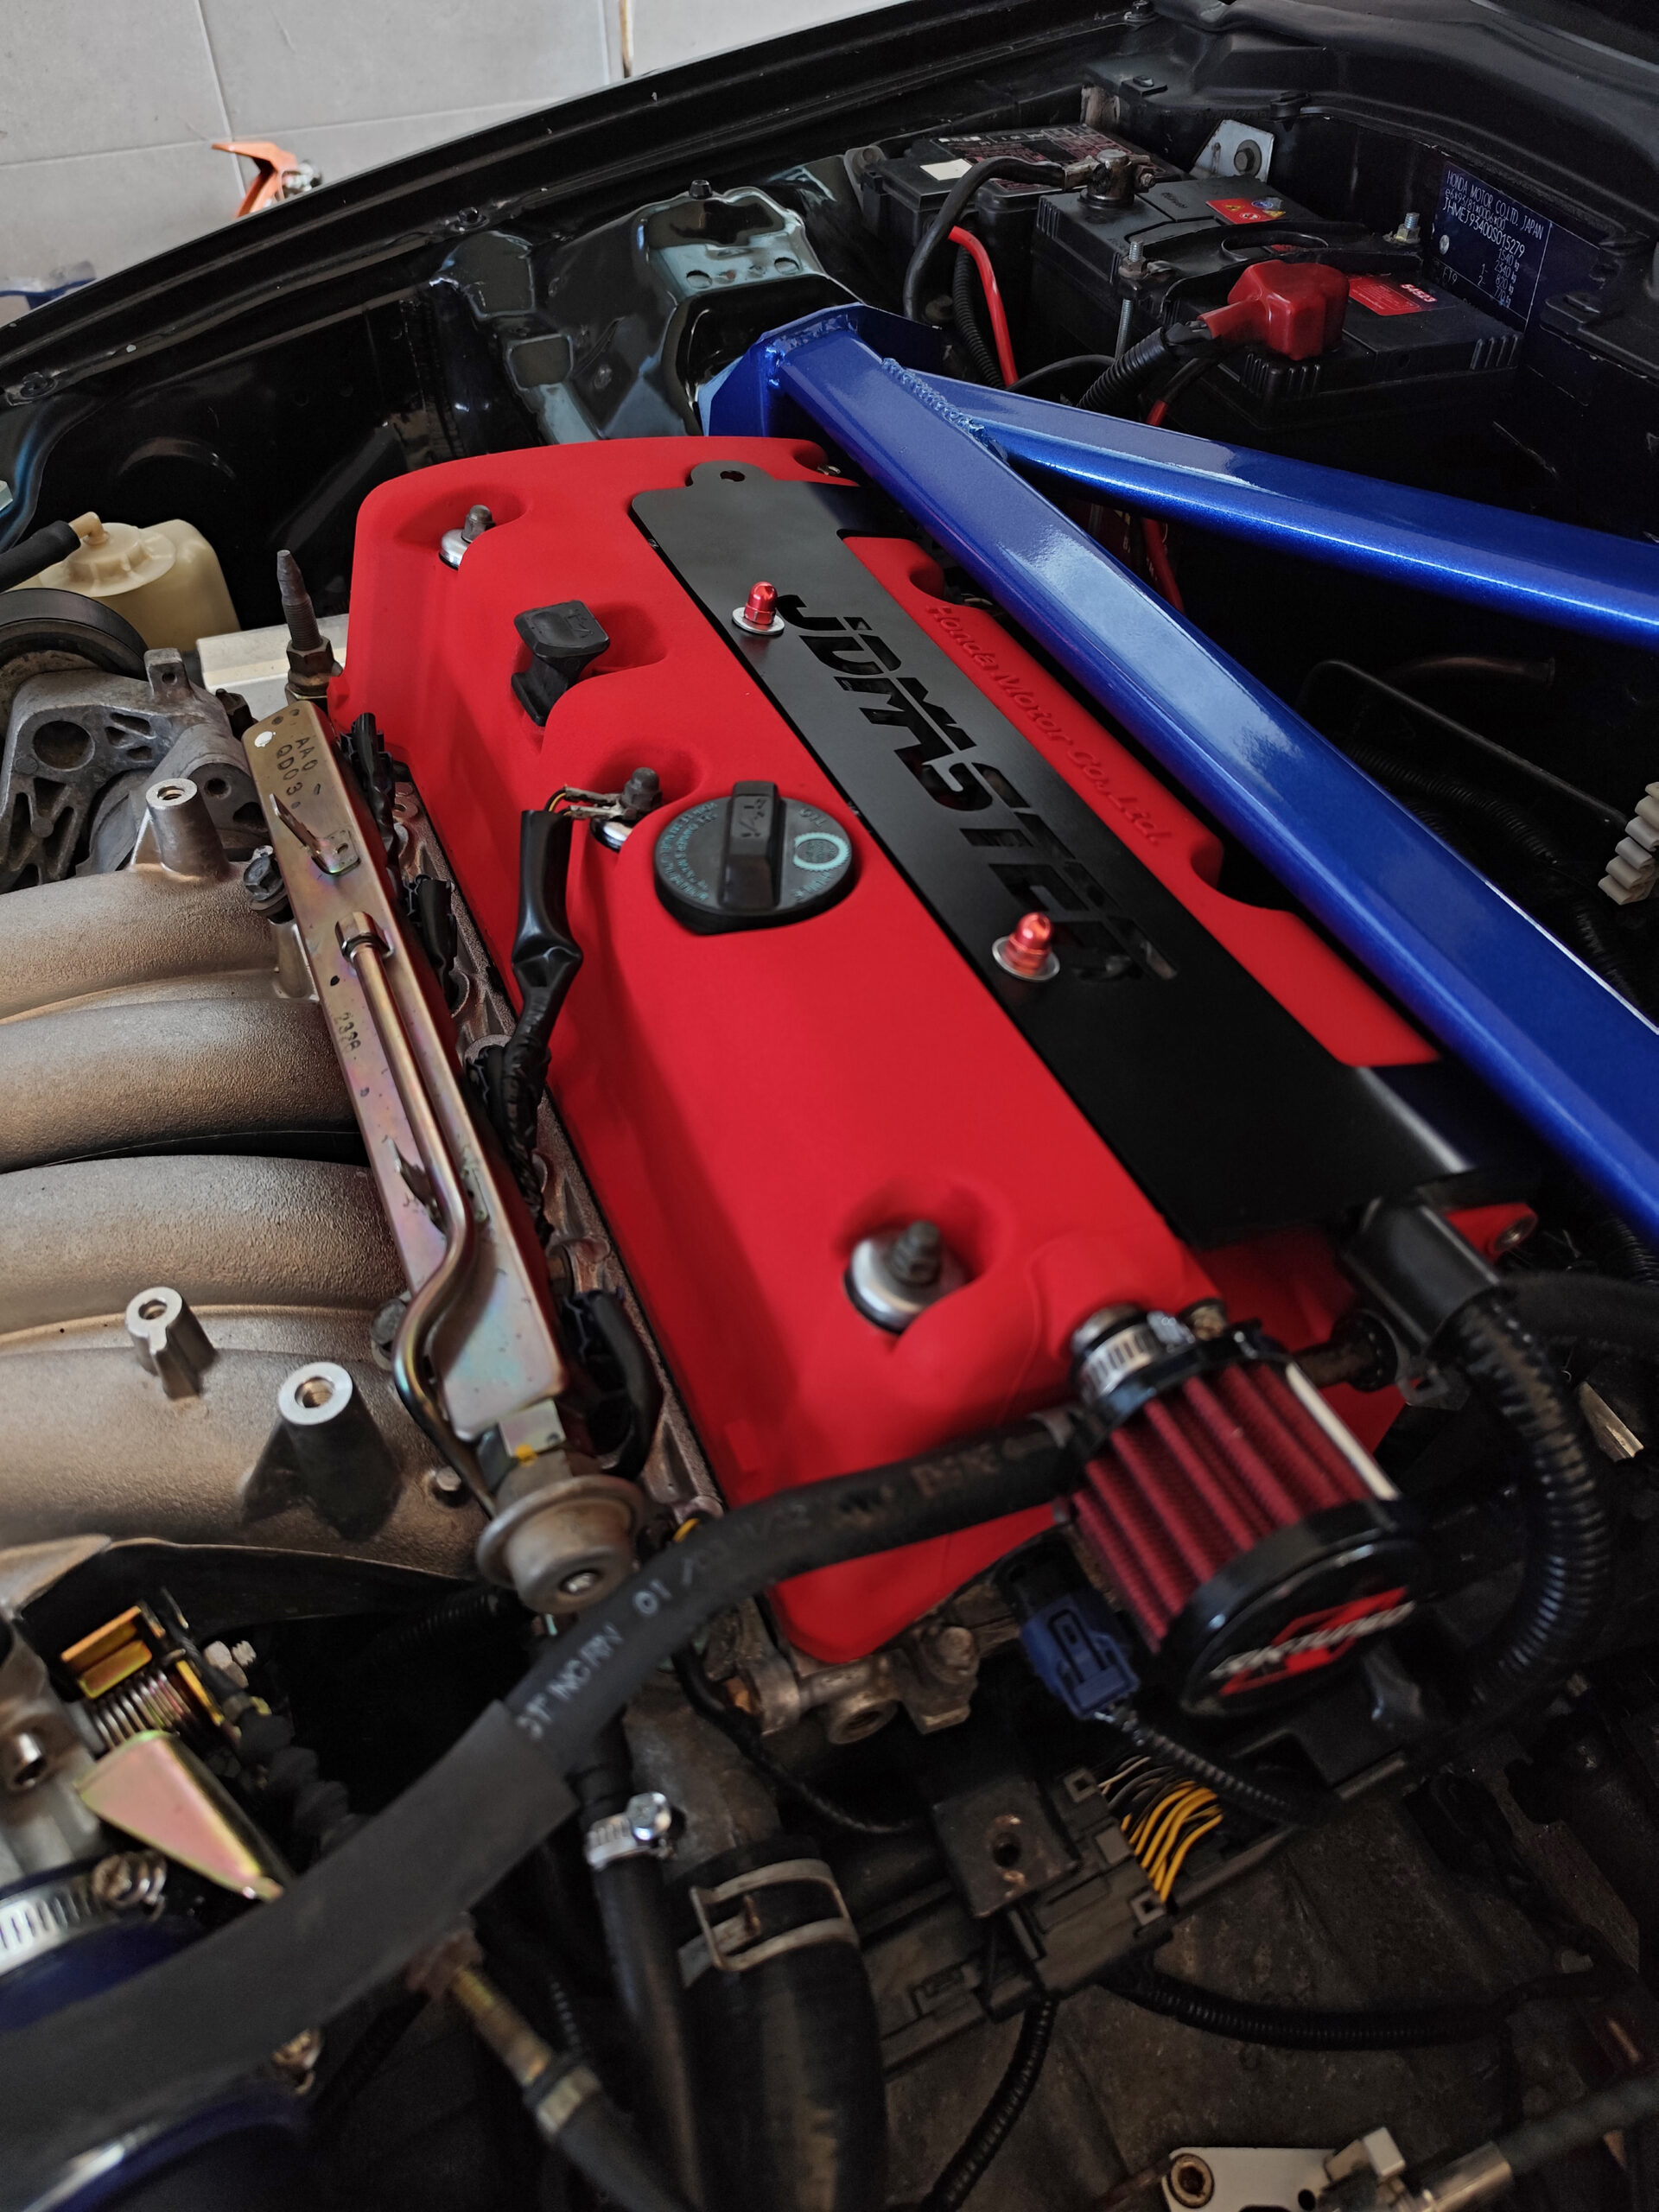
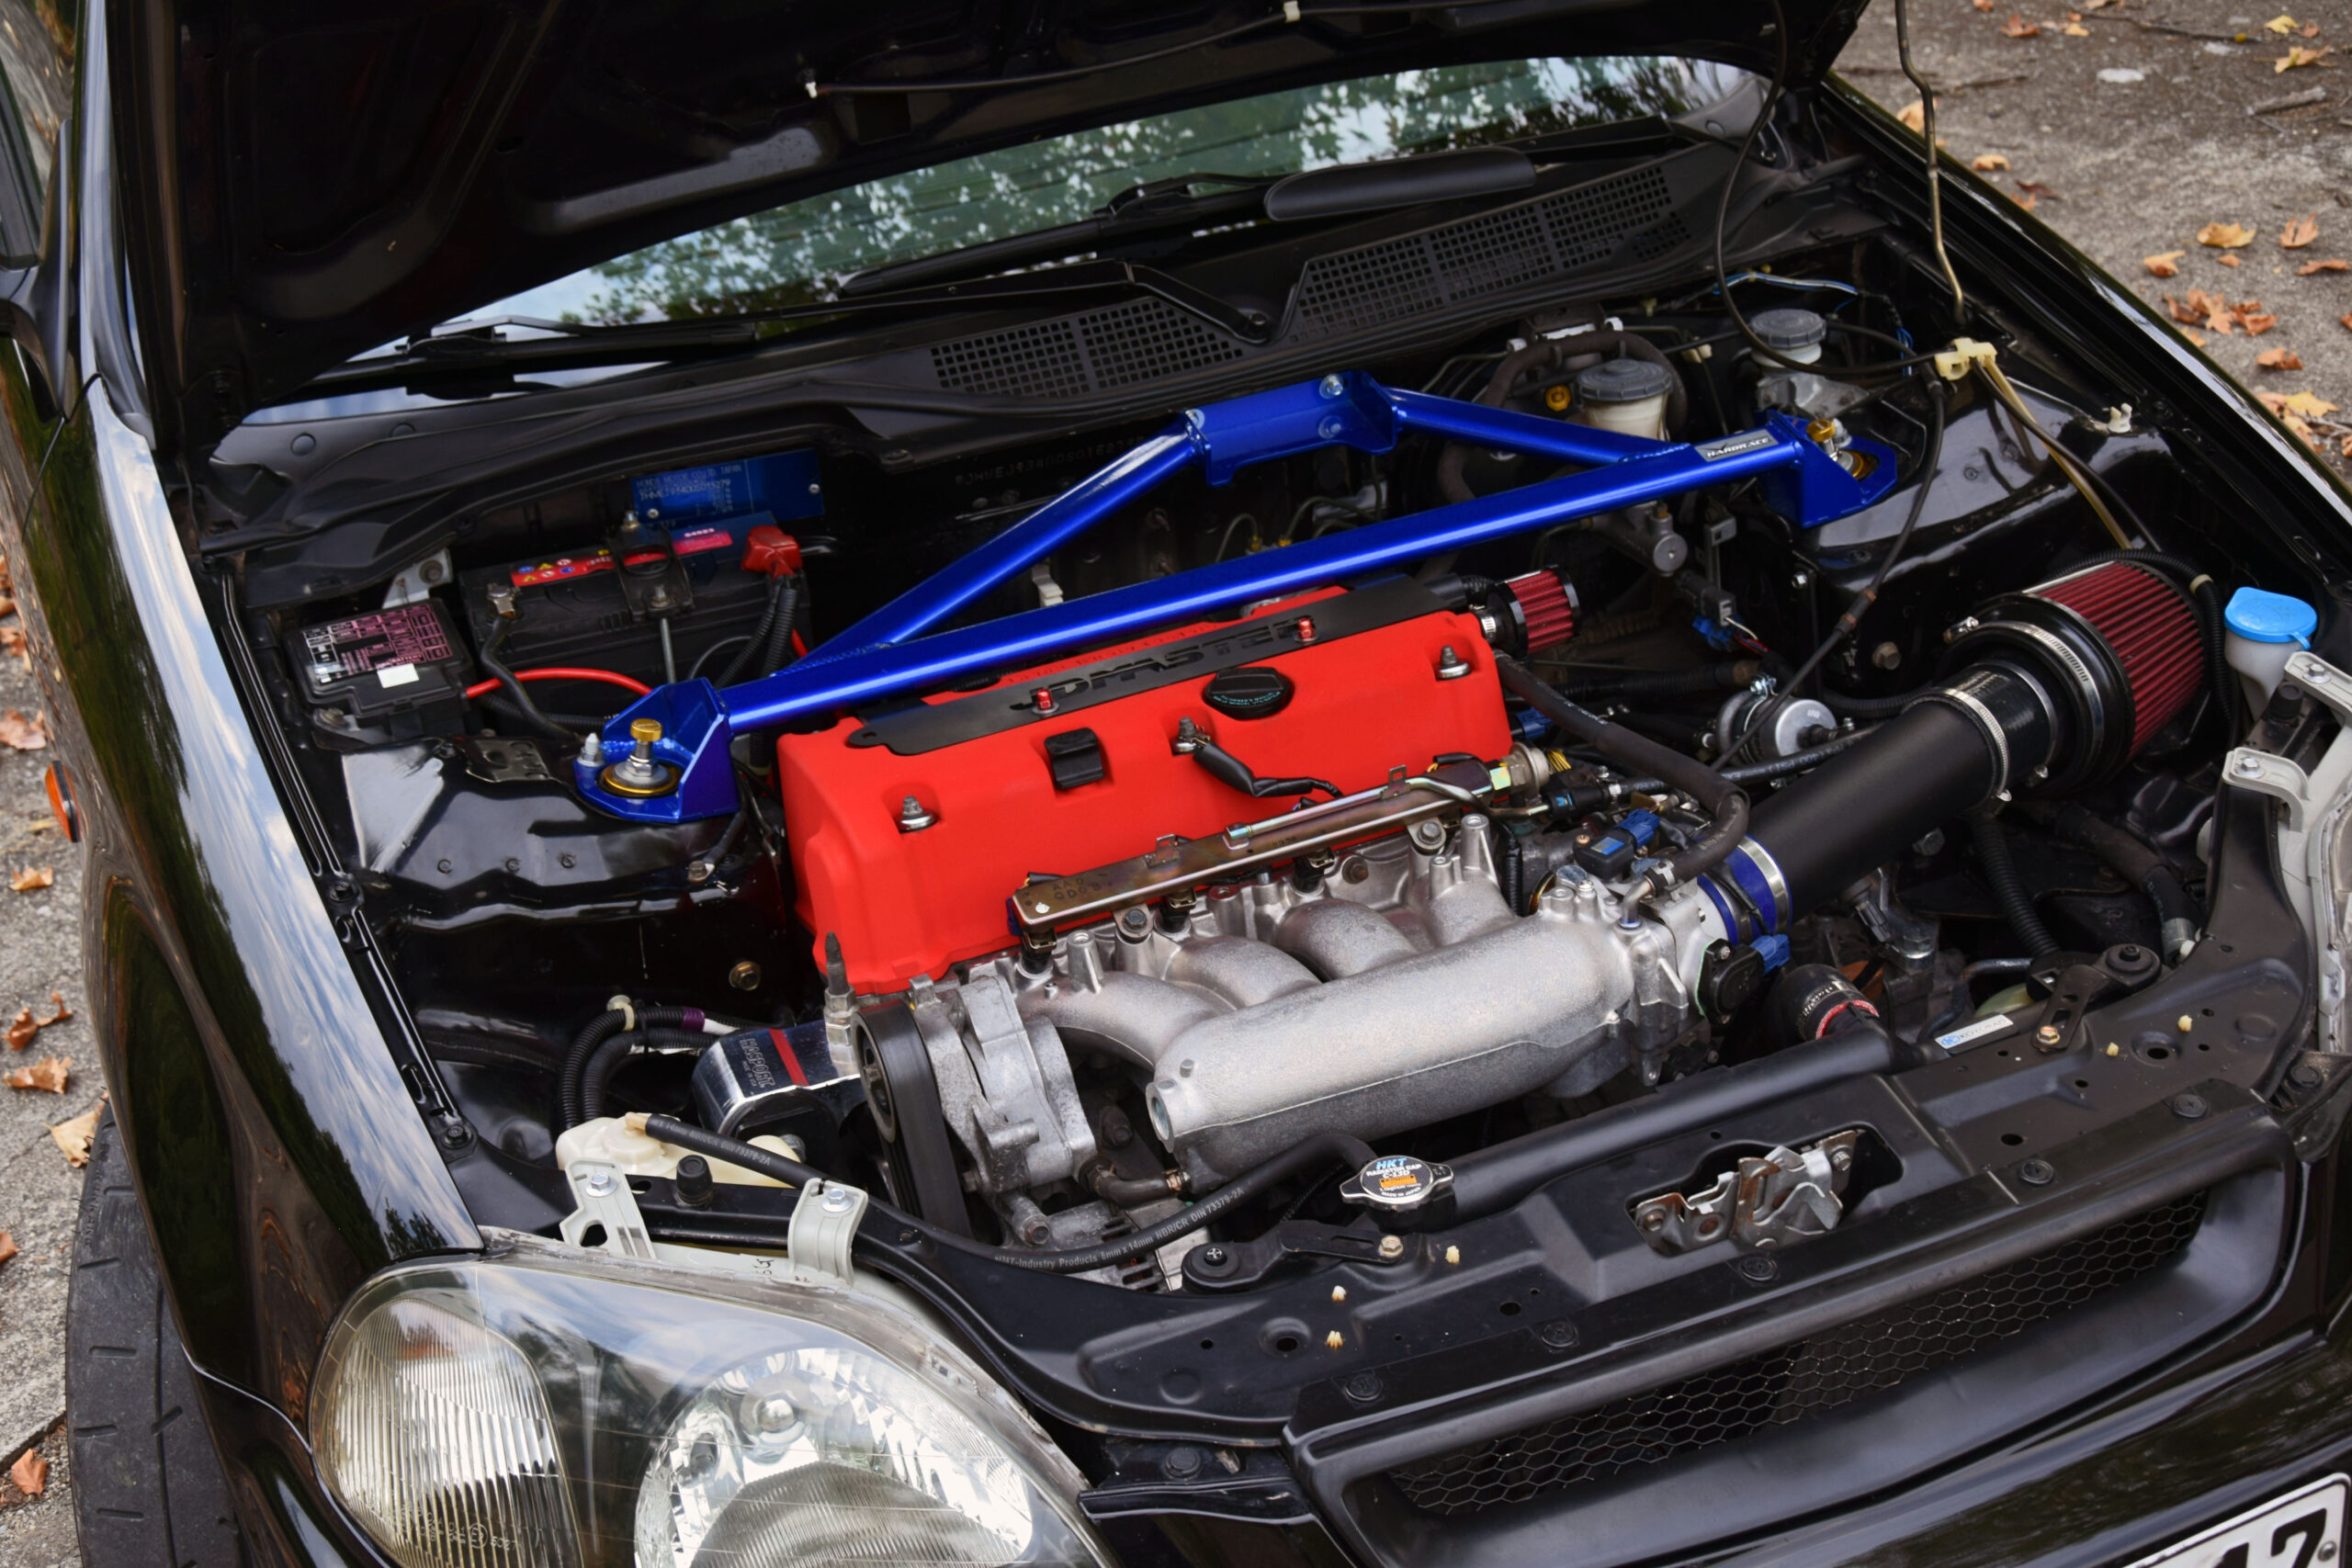
On the intake side, we chose the factory, power proven, Honda RBC intake manifold, paired with a 70mm K-tuned cast throttle body.
Fresh air goes through the custom 76mm air intake kit, which provides an orgasmic sound on VTEC crossover and all the way up to the rev limit of 8,700rpm.

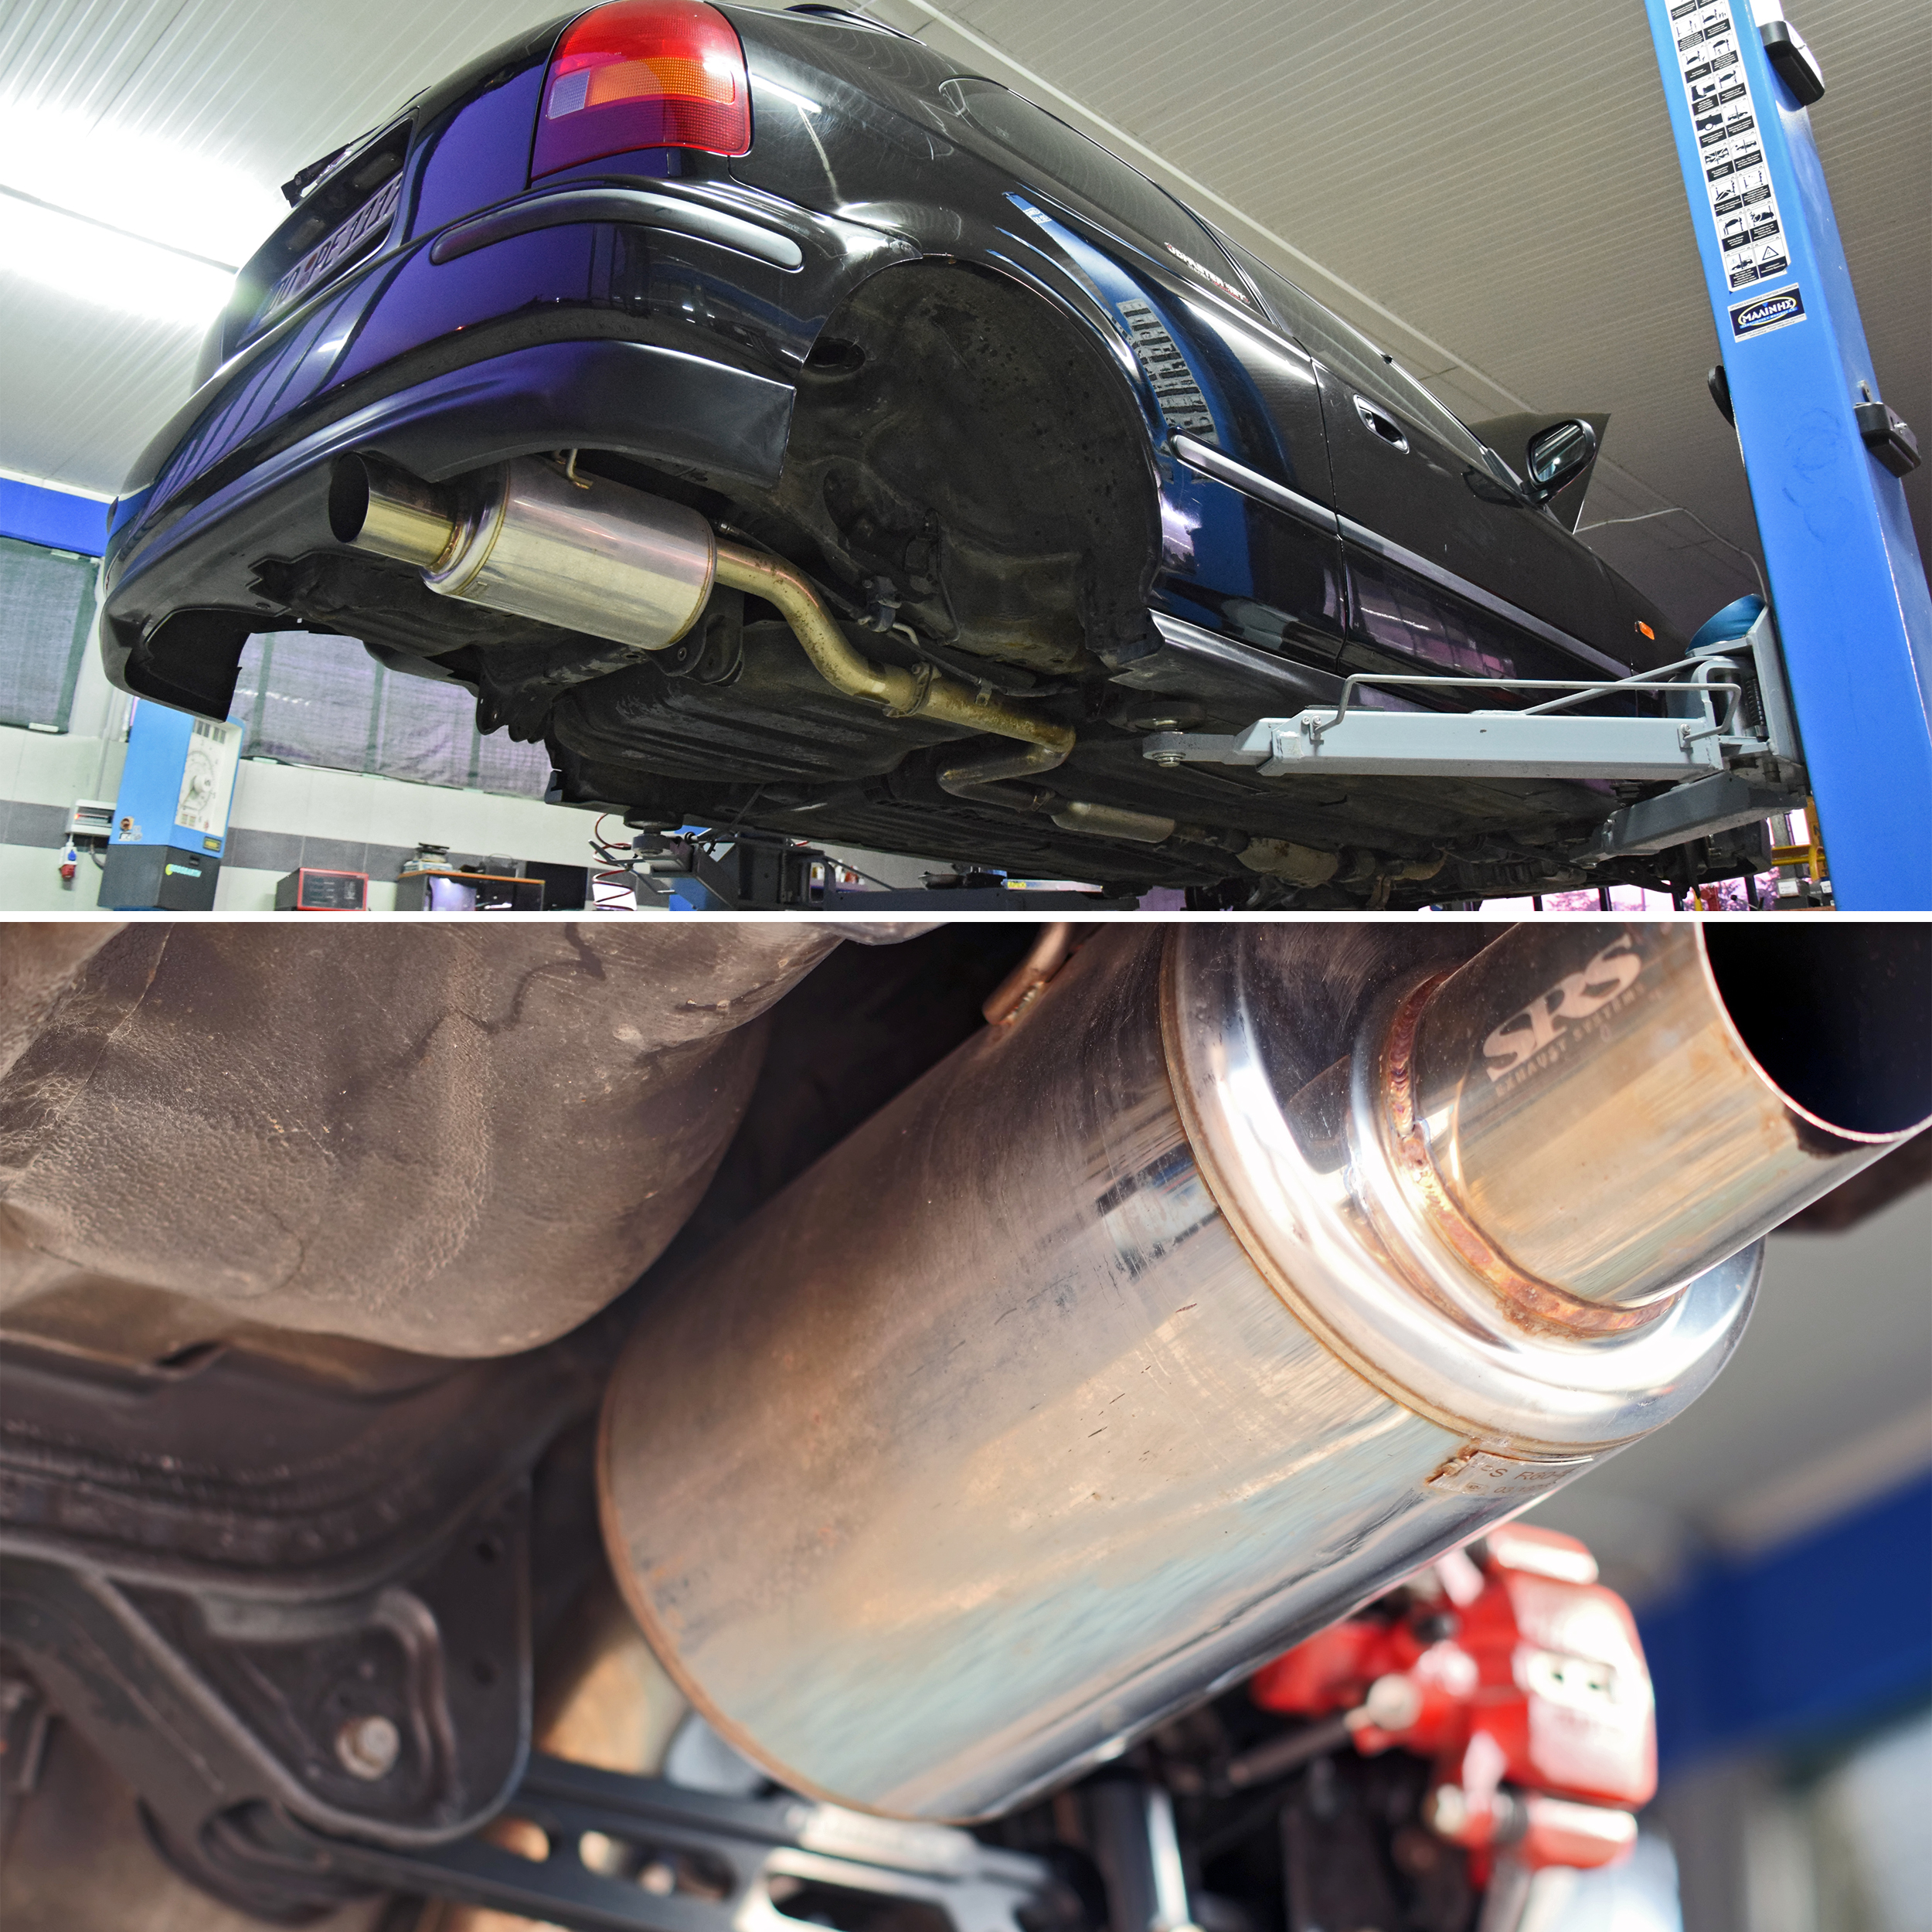
On the exhaust side, the K-tuned 4-2-1 header was combined with a street exhaust setup custom modified to retain the factory EP3 catalytic converter matched to the SRS R60 catback system. Smart solution, but also street friendly for those that daily drive their cars and try to keep a reasonable noise level.


The fuel system, which was initially made up of unknown knock-off products, was fully replaced back to OEM spec.
Again, simplicity over complexity. The OEM fuel rail, connected with an inline return-type fuel filter and the Walbro 255 in-tank fuel pump, is the best, most reliable solution in terms of fuel supply.
The demand for instant aftermarket fuel support is often overrated. It’s always up to what you aim for and what you actually need.
Transmission Setup
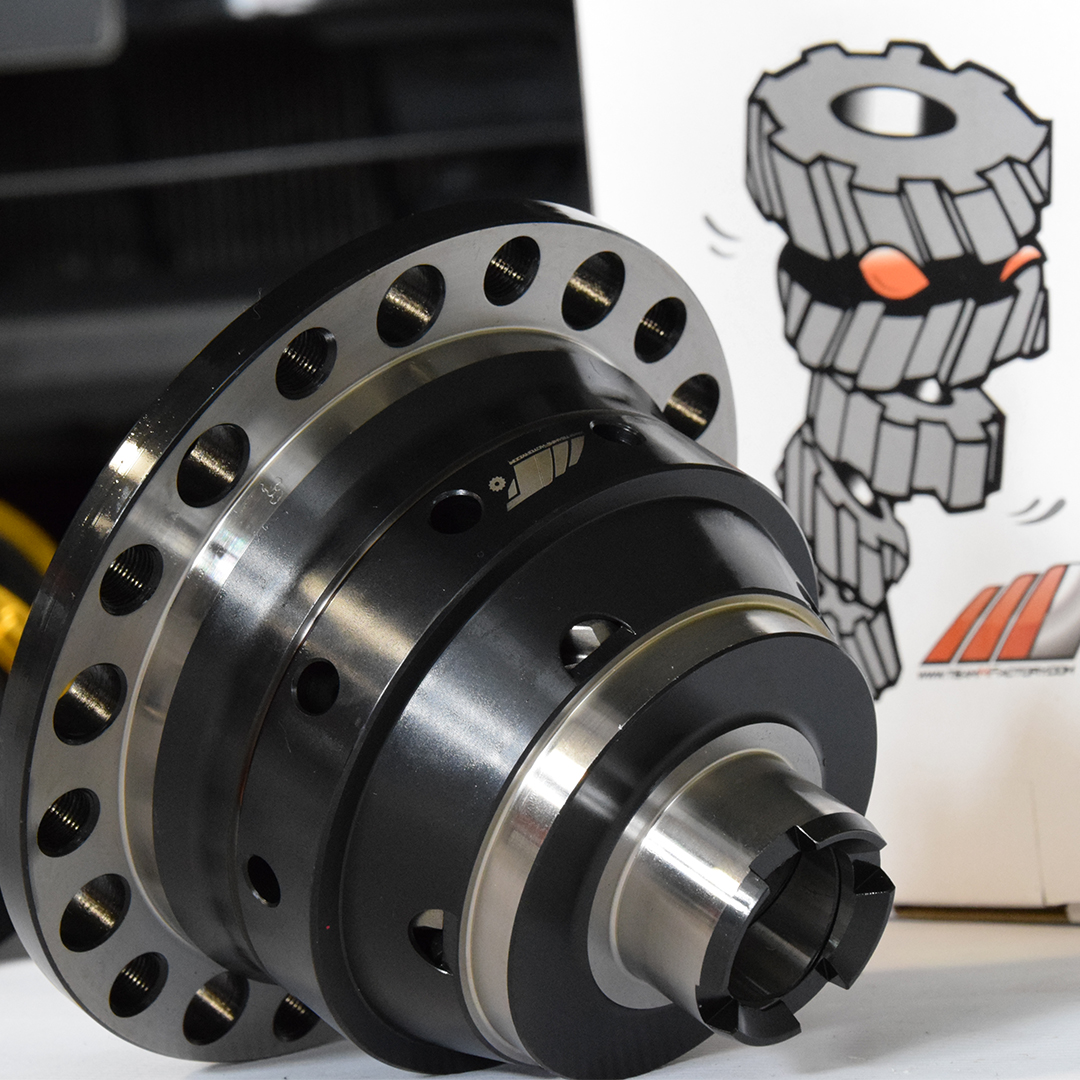
Not much was needed to improve on a rather sharp, responsive 6-speed EP3 gearbox. The addition of the Mfactory helical LSD provided the traction needed to transfer the power properly on both wheels.
Shifter feel is another key component in making a K-swap feel oem+ and rock solid. We used the K-Tuned Billet Race-Spec Shifter along with K-Tuned cables, known for their crisp engagement, tight tolerances, and durability under aggressive driving.

This setup not only positions the shifter up and close to the driver with plenty of adjustability, but also ensures a precise, connected feel. One of the most satisfying parts of the build, especially when you are banging gears flat.
Type R “wannabe”
Trying to be realistic, in a more OG perspective we could have gathered most of the OEM EK9 genuine parts you can get. But in reality, this is not an easy task, nor a budget-wise option. Genuine bodyparts are not easy to find since prices have skyrocketed on the market, and so on. While the original parts are the real deal, when you want to keep the budget on point, you focus on what matters in terms of price and time. So we built up with aftermarket body parts.
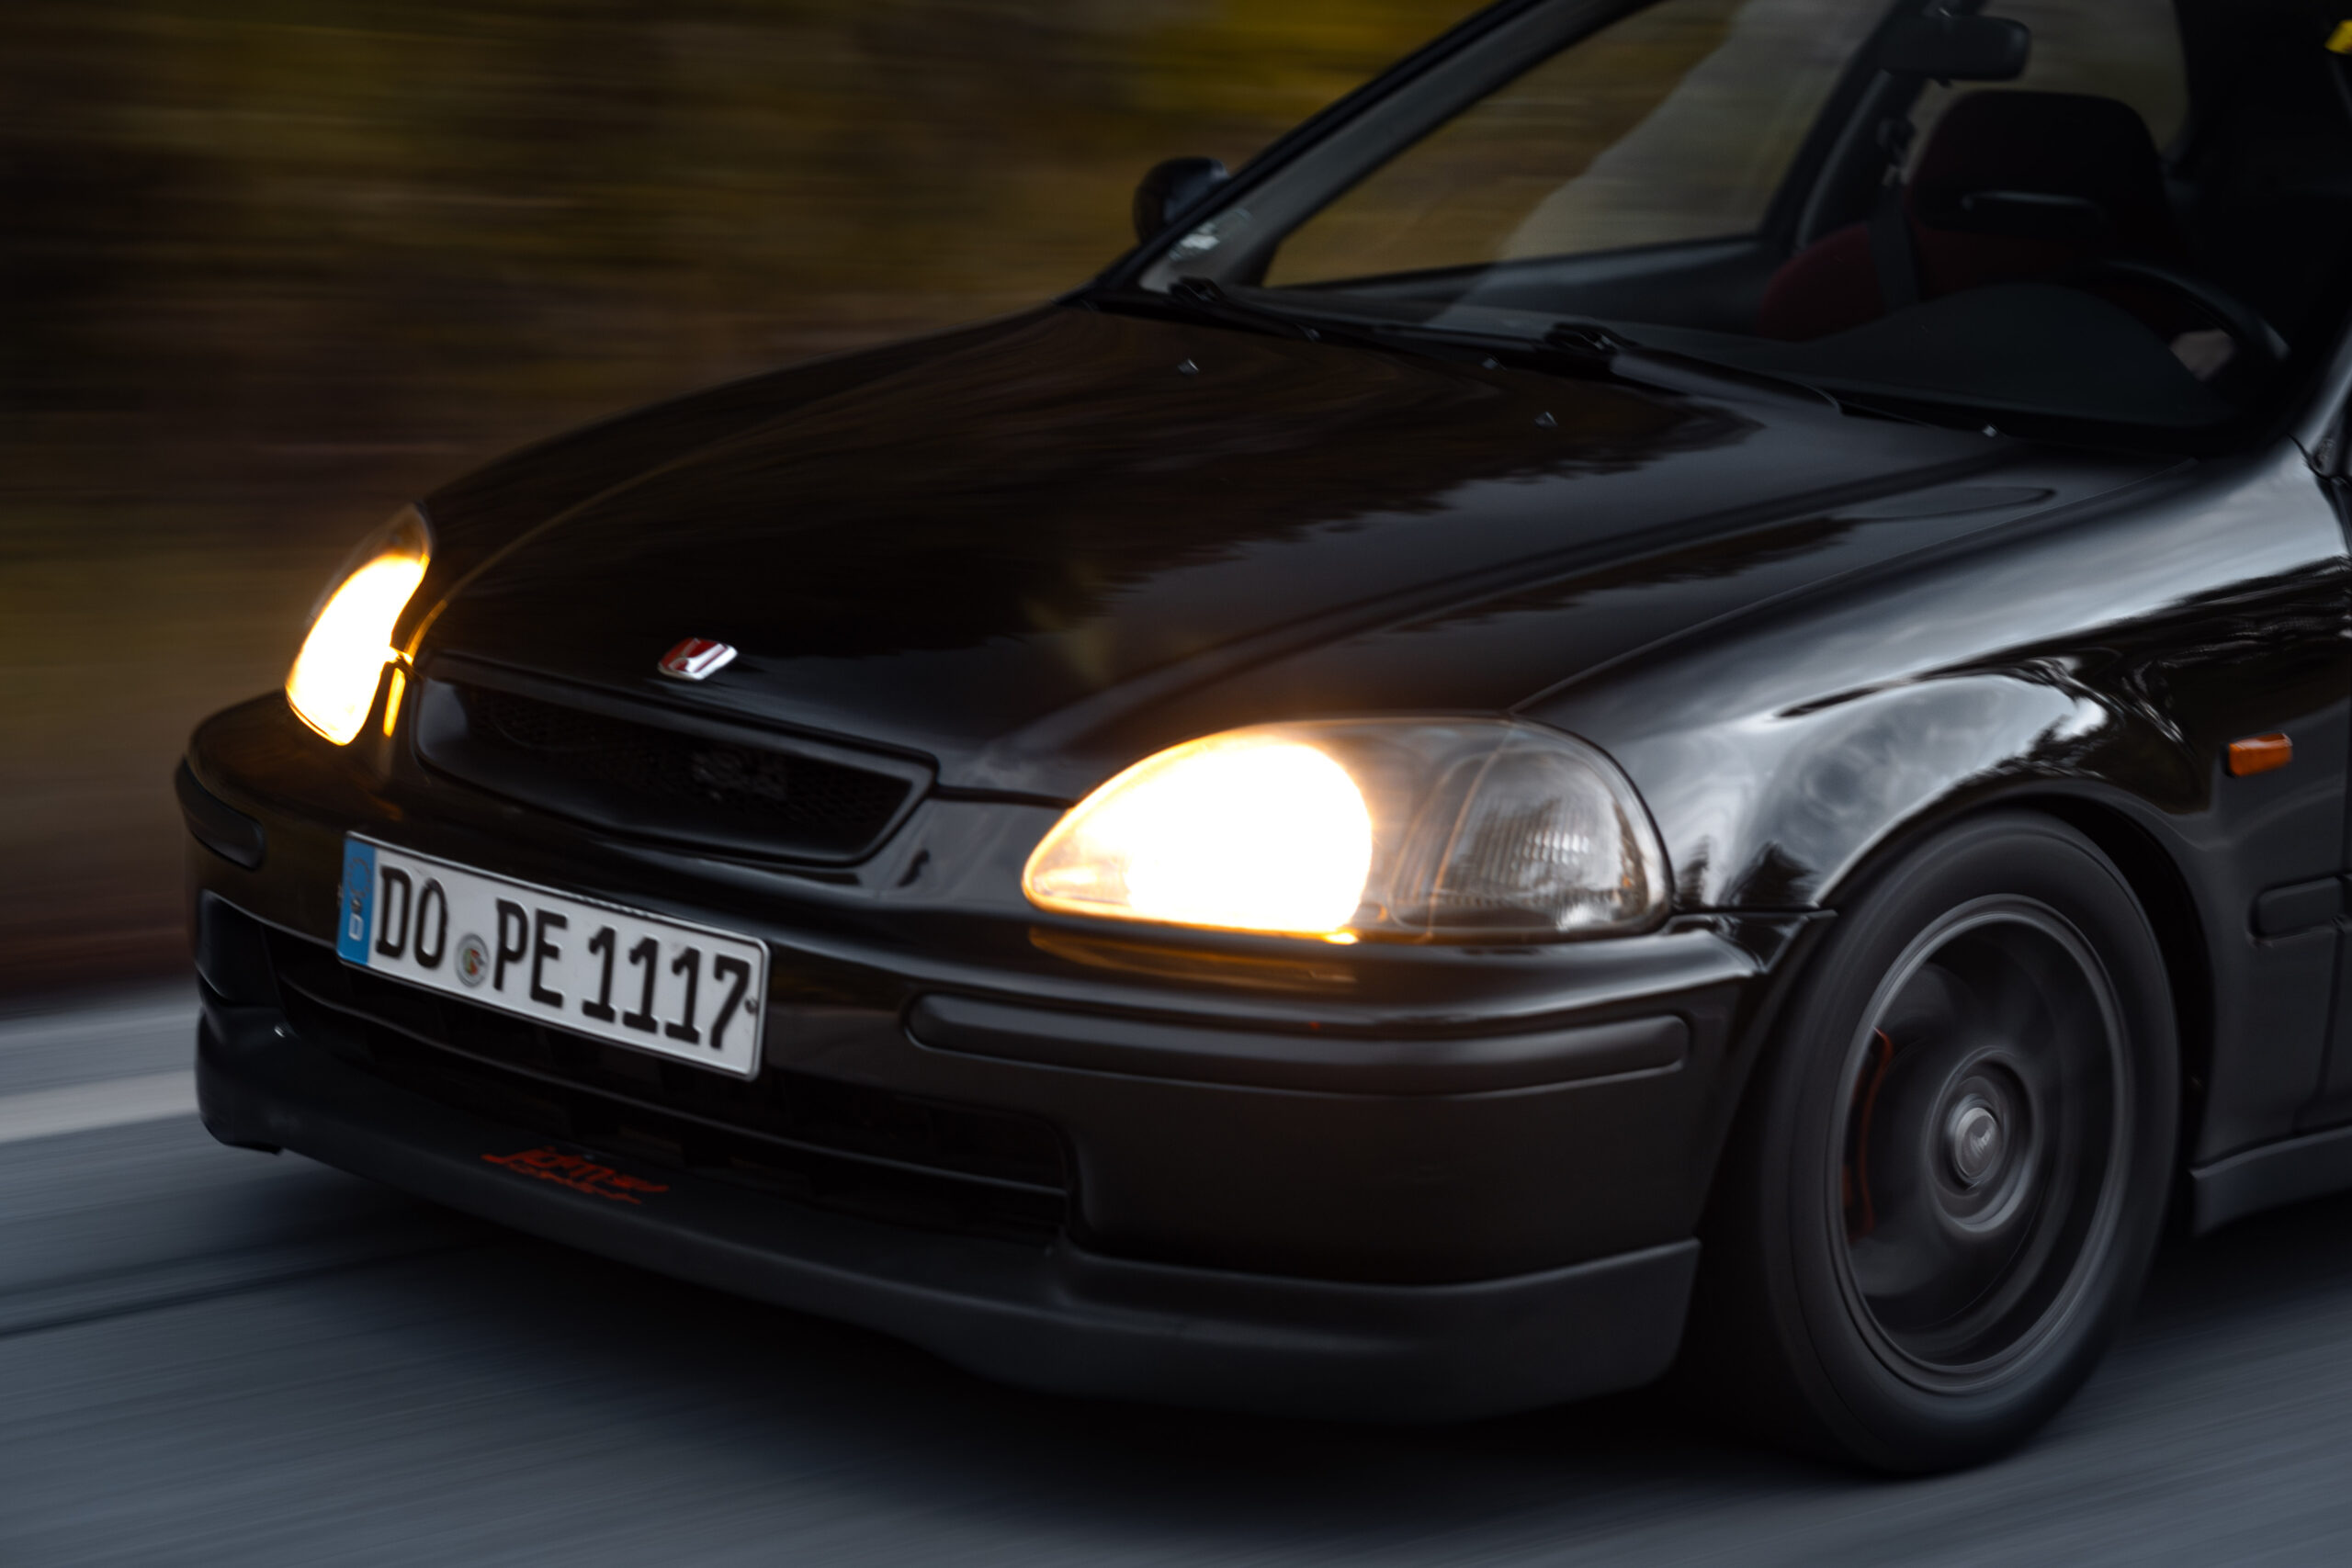
Taking a first look into the car you instantly start noticing the additions that where made to make a nice looking Civic EK. The stock headlights were modified by being painted black on their inner housing.

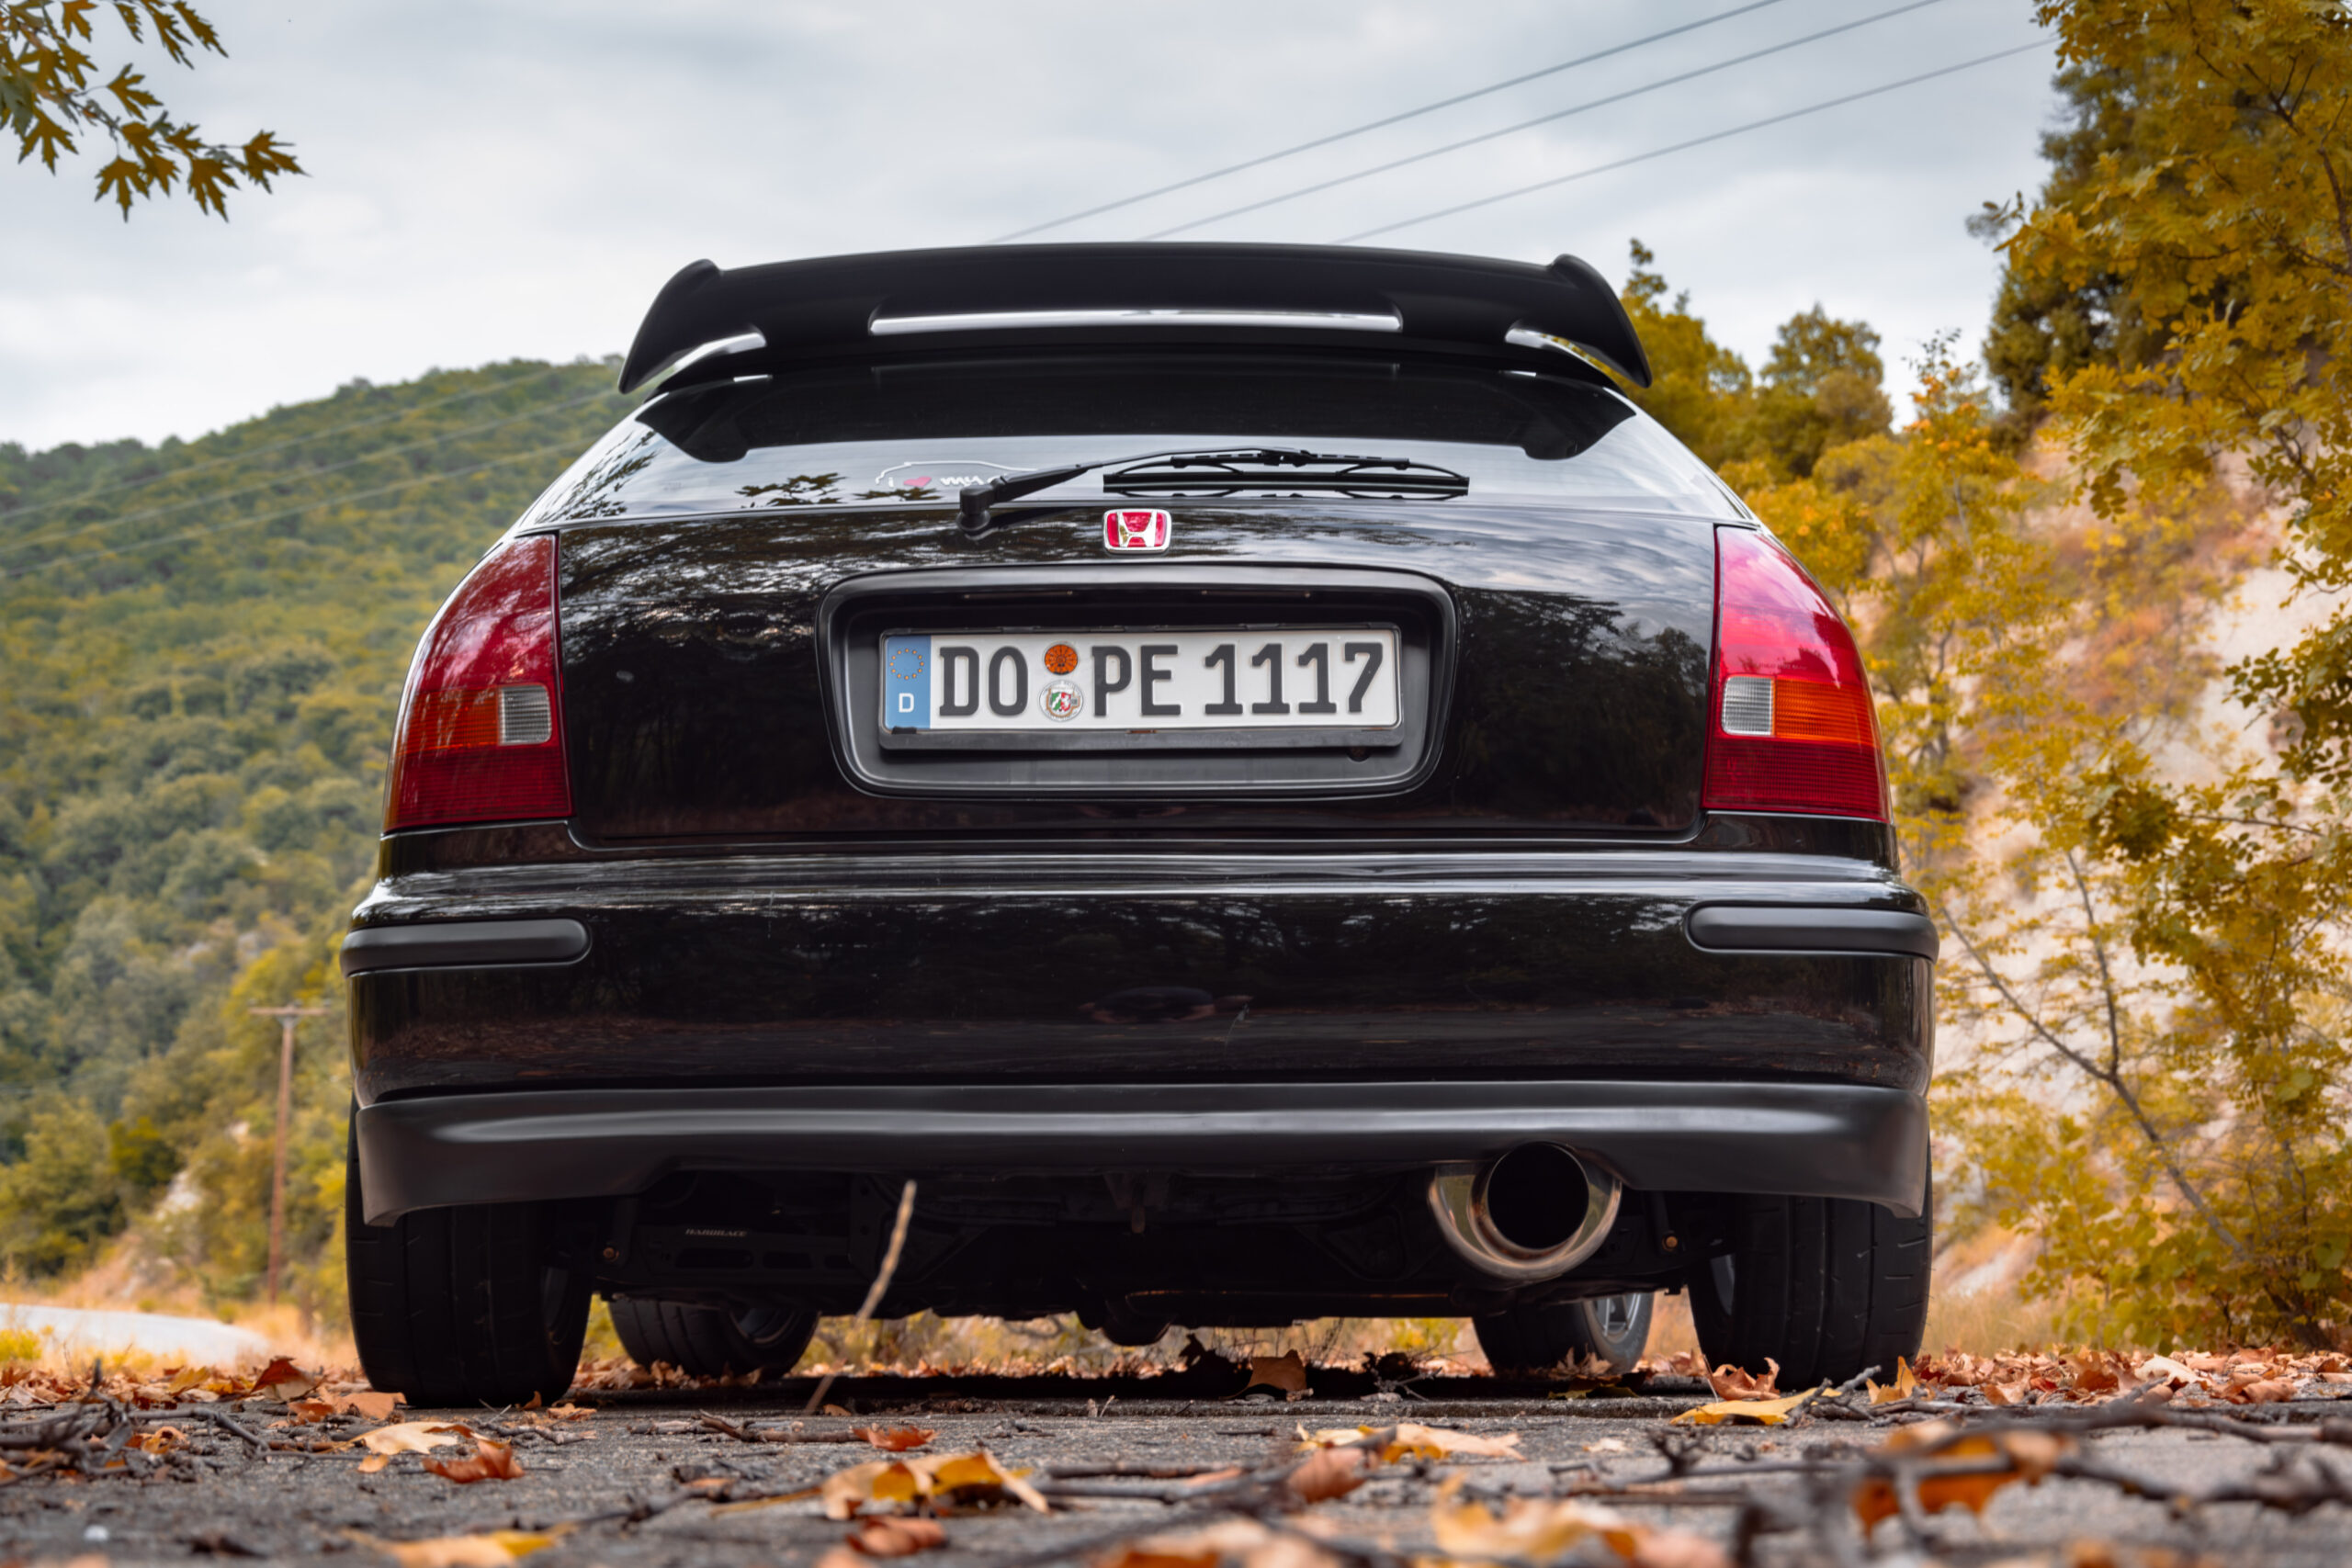
Trying to keep the bodywork in decent form, we equipped it with a front and rear EK9 style lip which are made of ABS plastic. The original grille was replaced with a Type R style mesh grille. As for the final touches, the OEM Type-R, red badges, front and rear, gave a whole different look and made the exterior look the way it’s supposed to look, for pre-facelift versions.
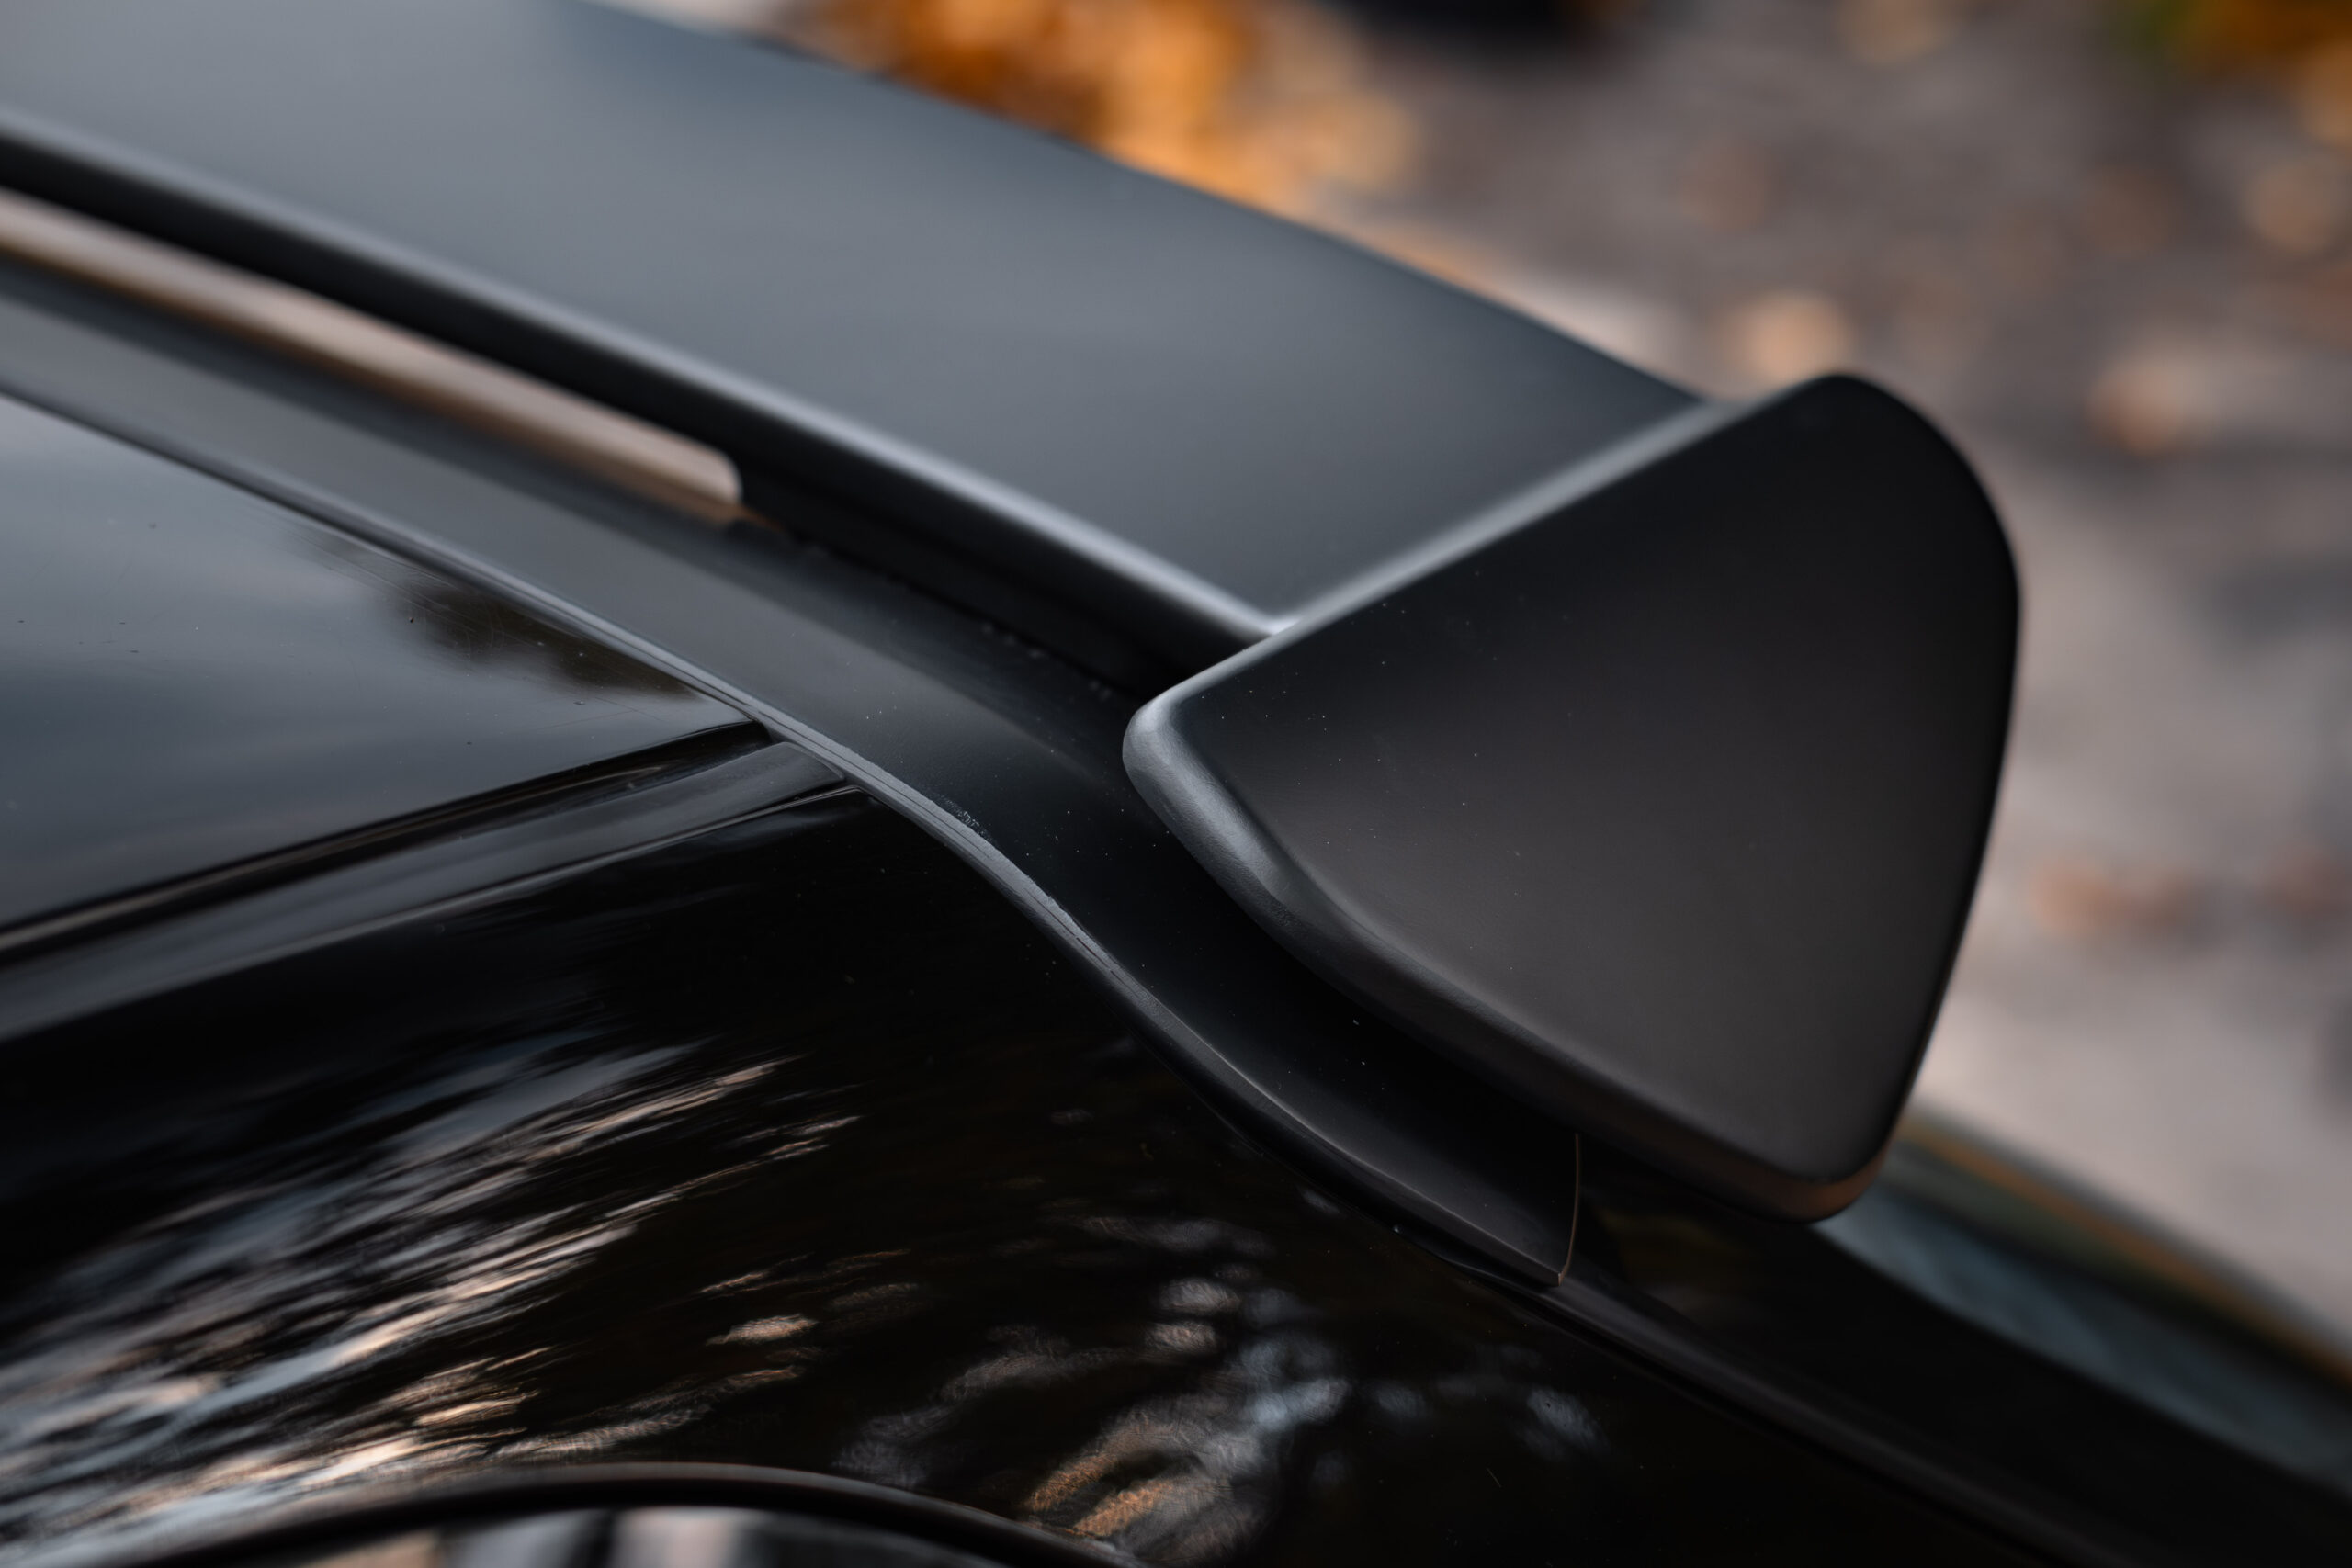
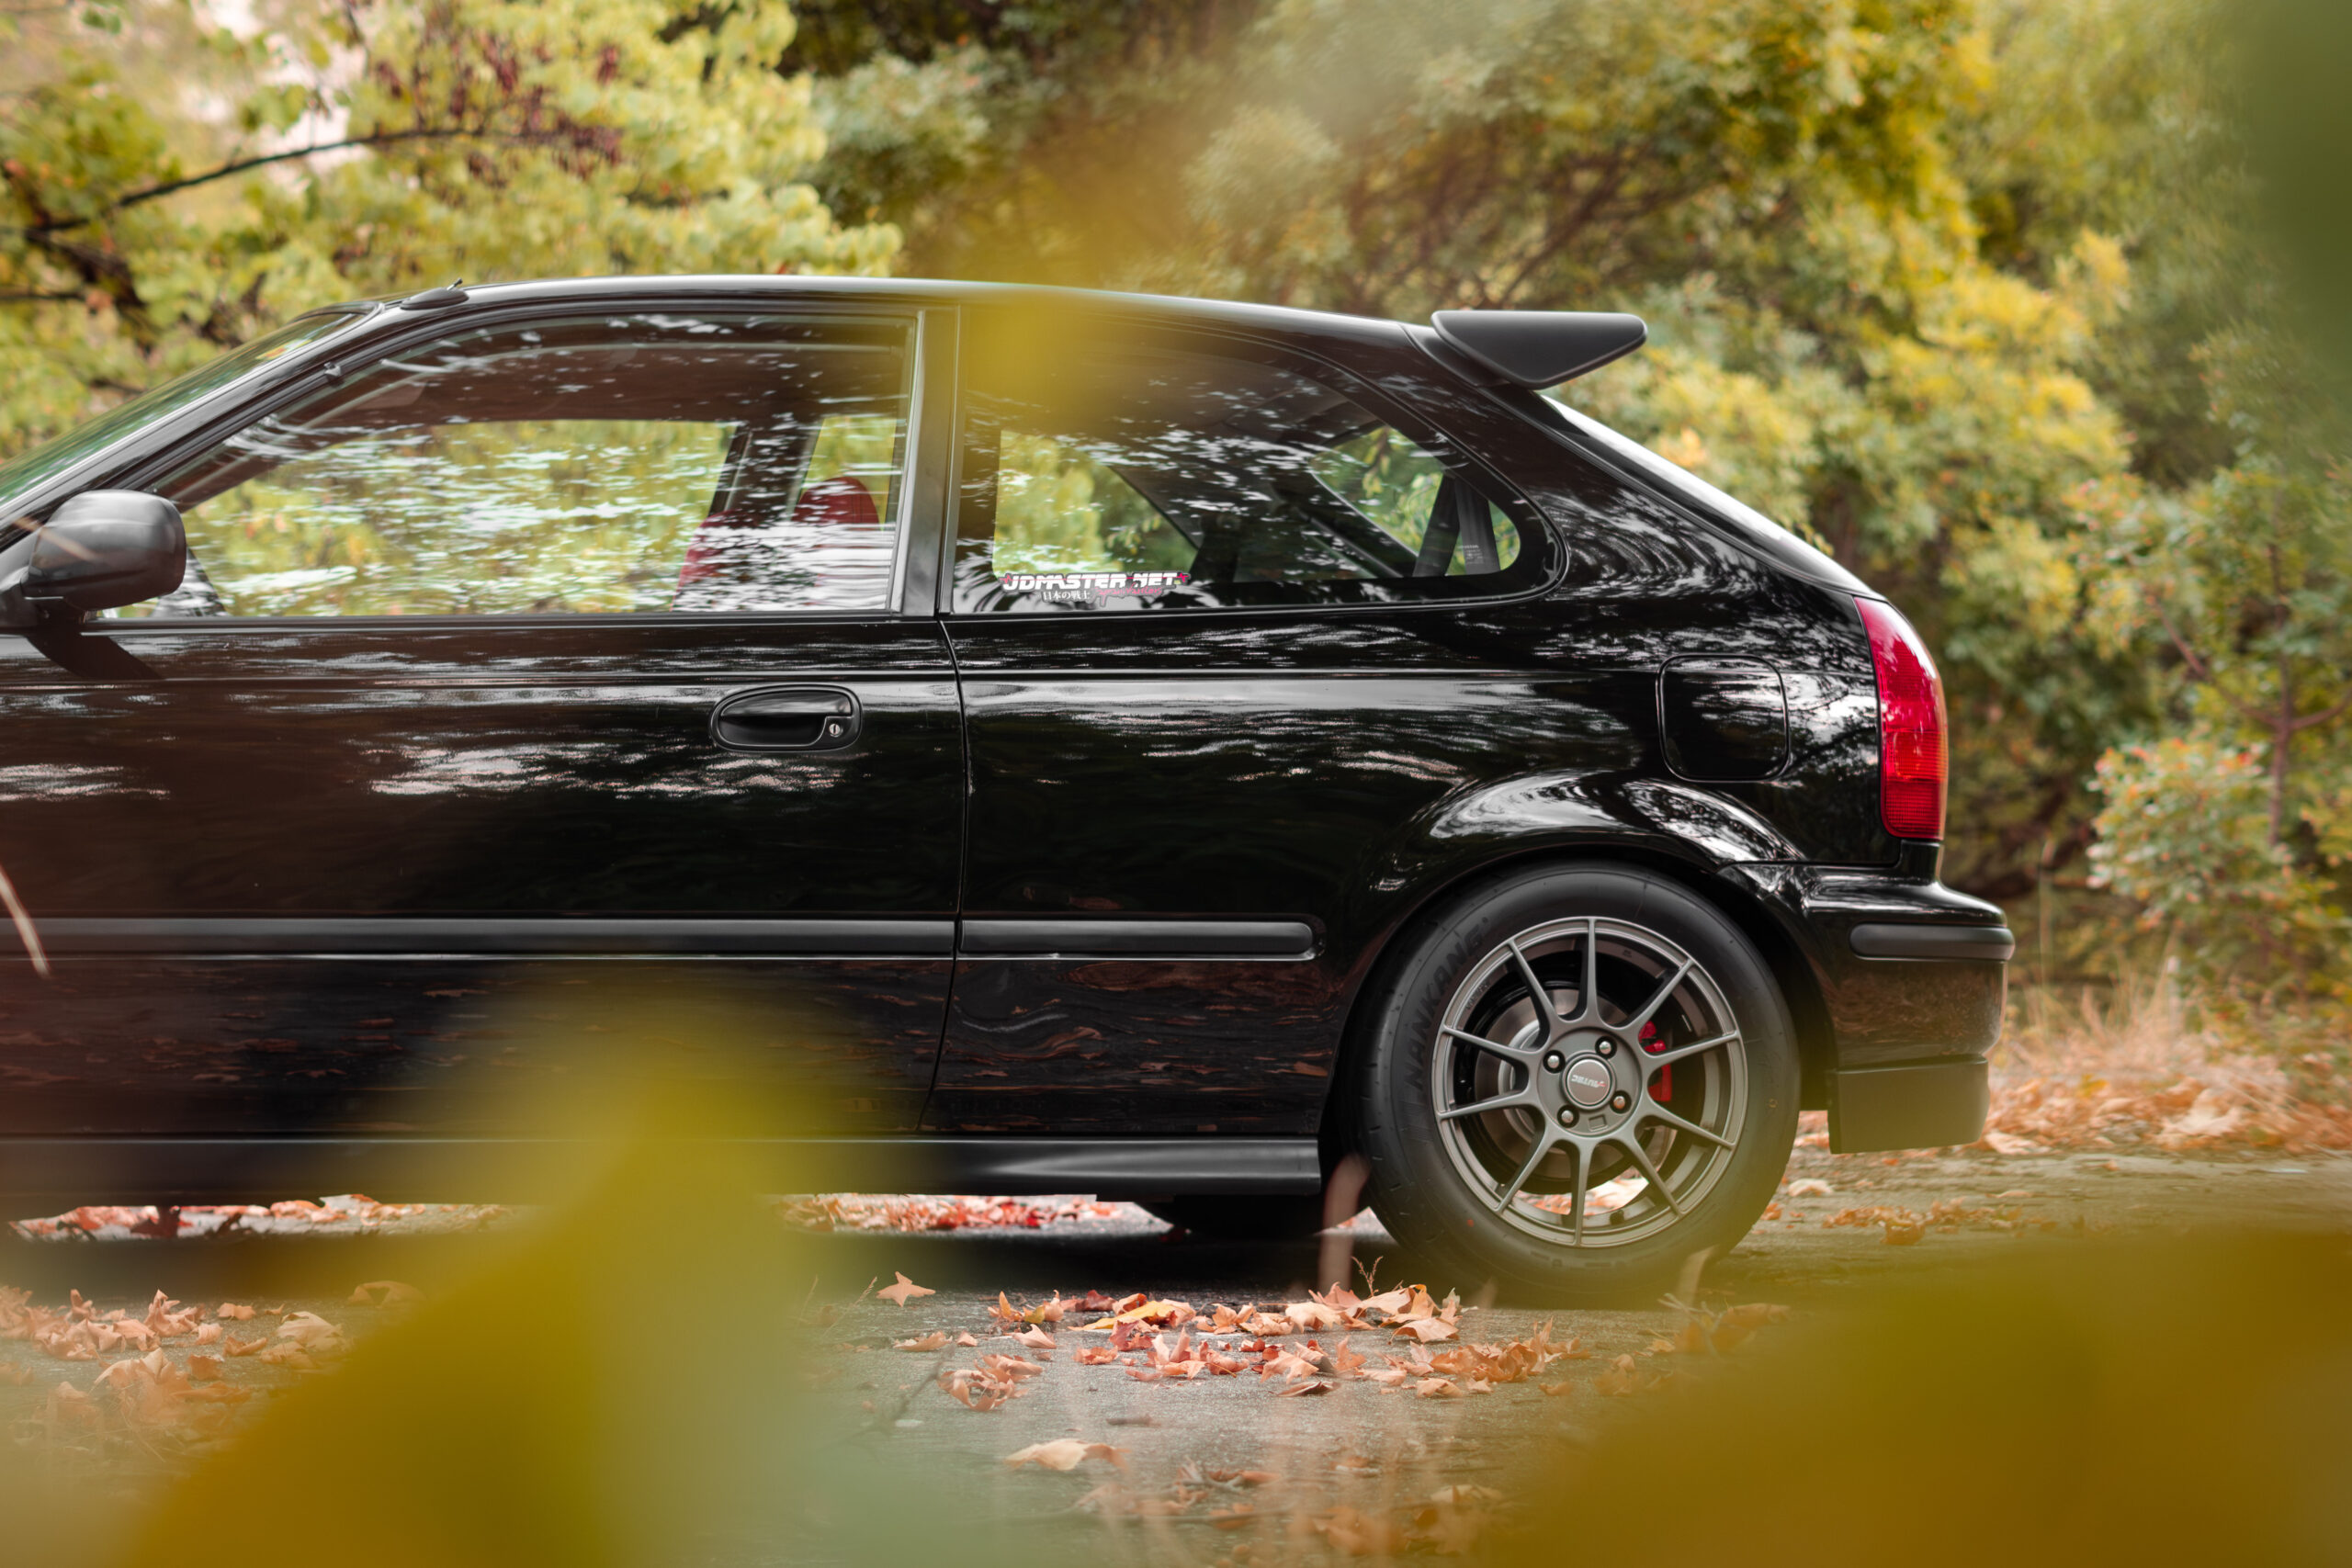
At the rear end, the most noticable feature is the Type-R style rear wing, also made from ABS plastic and as a result, it’s lightweight, easy to fit and of great quality.
No more boring stock Civic EK.
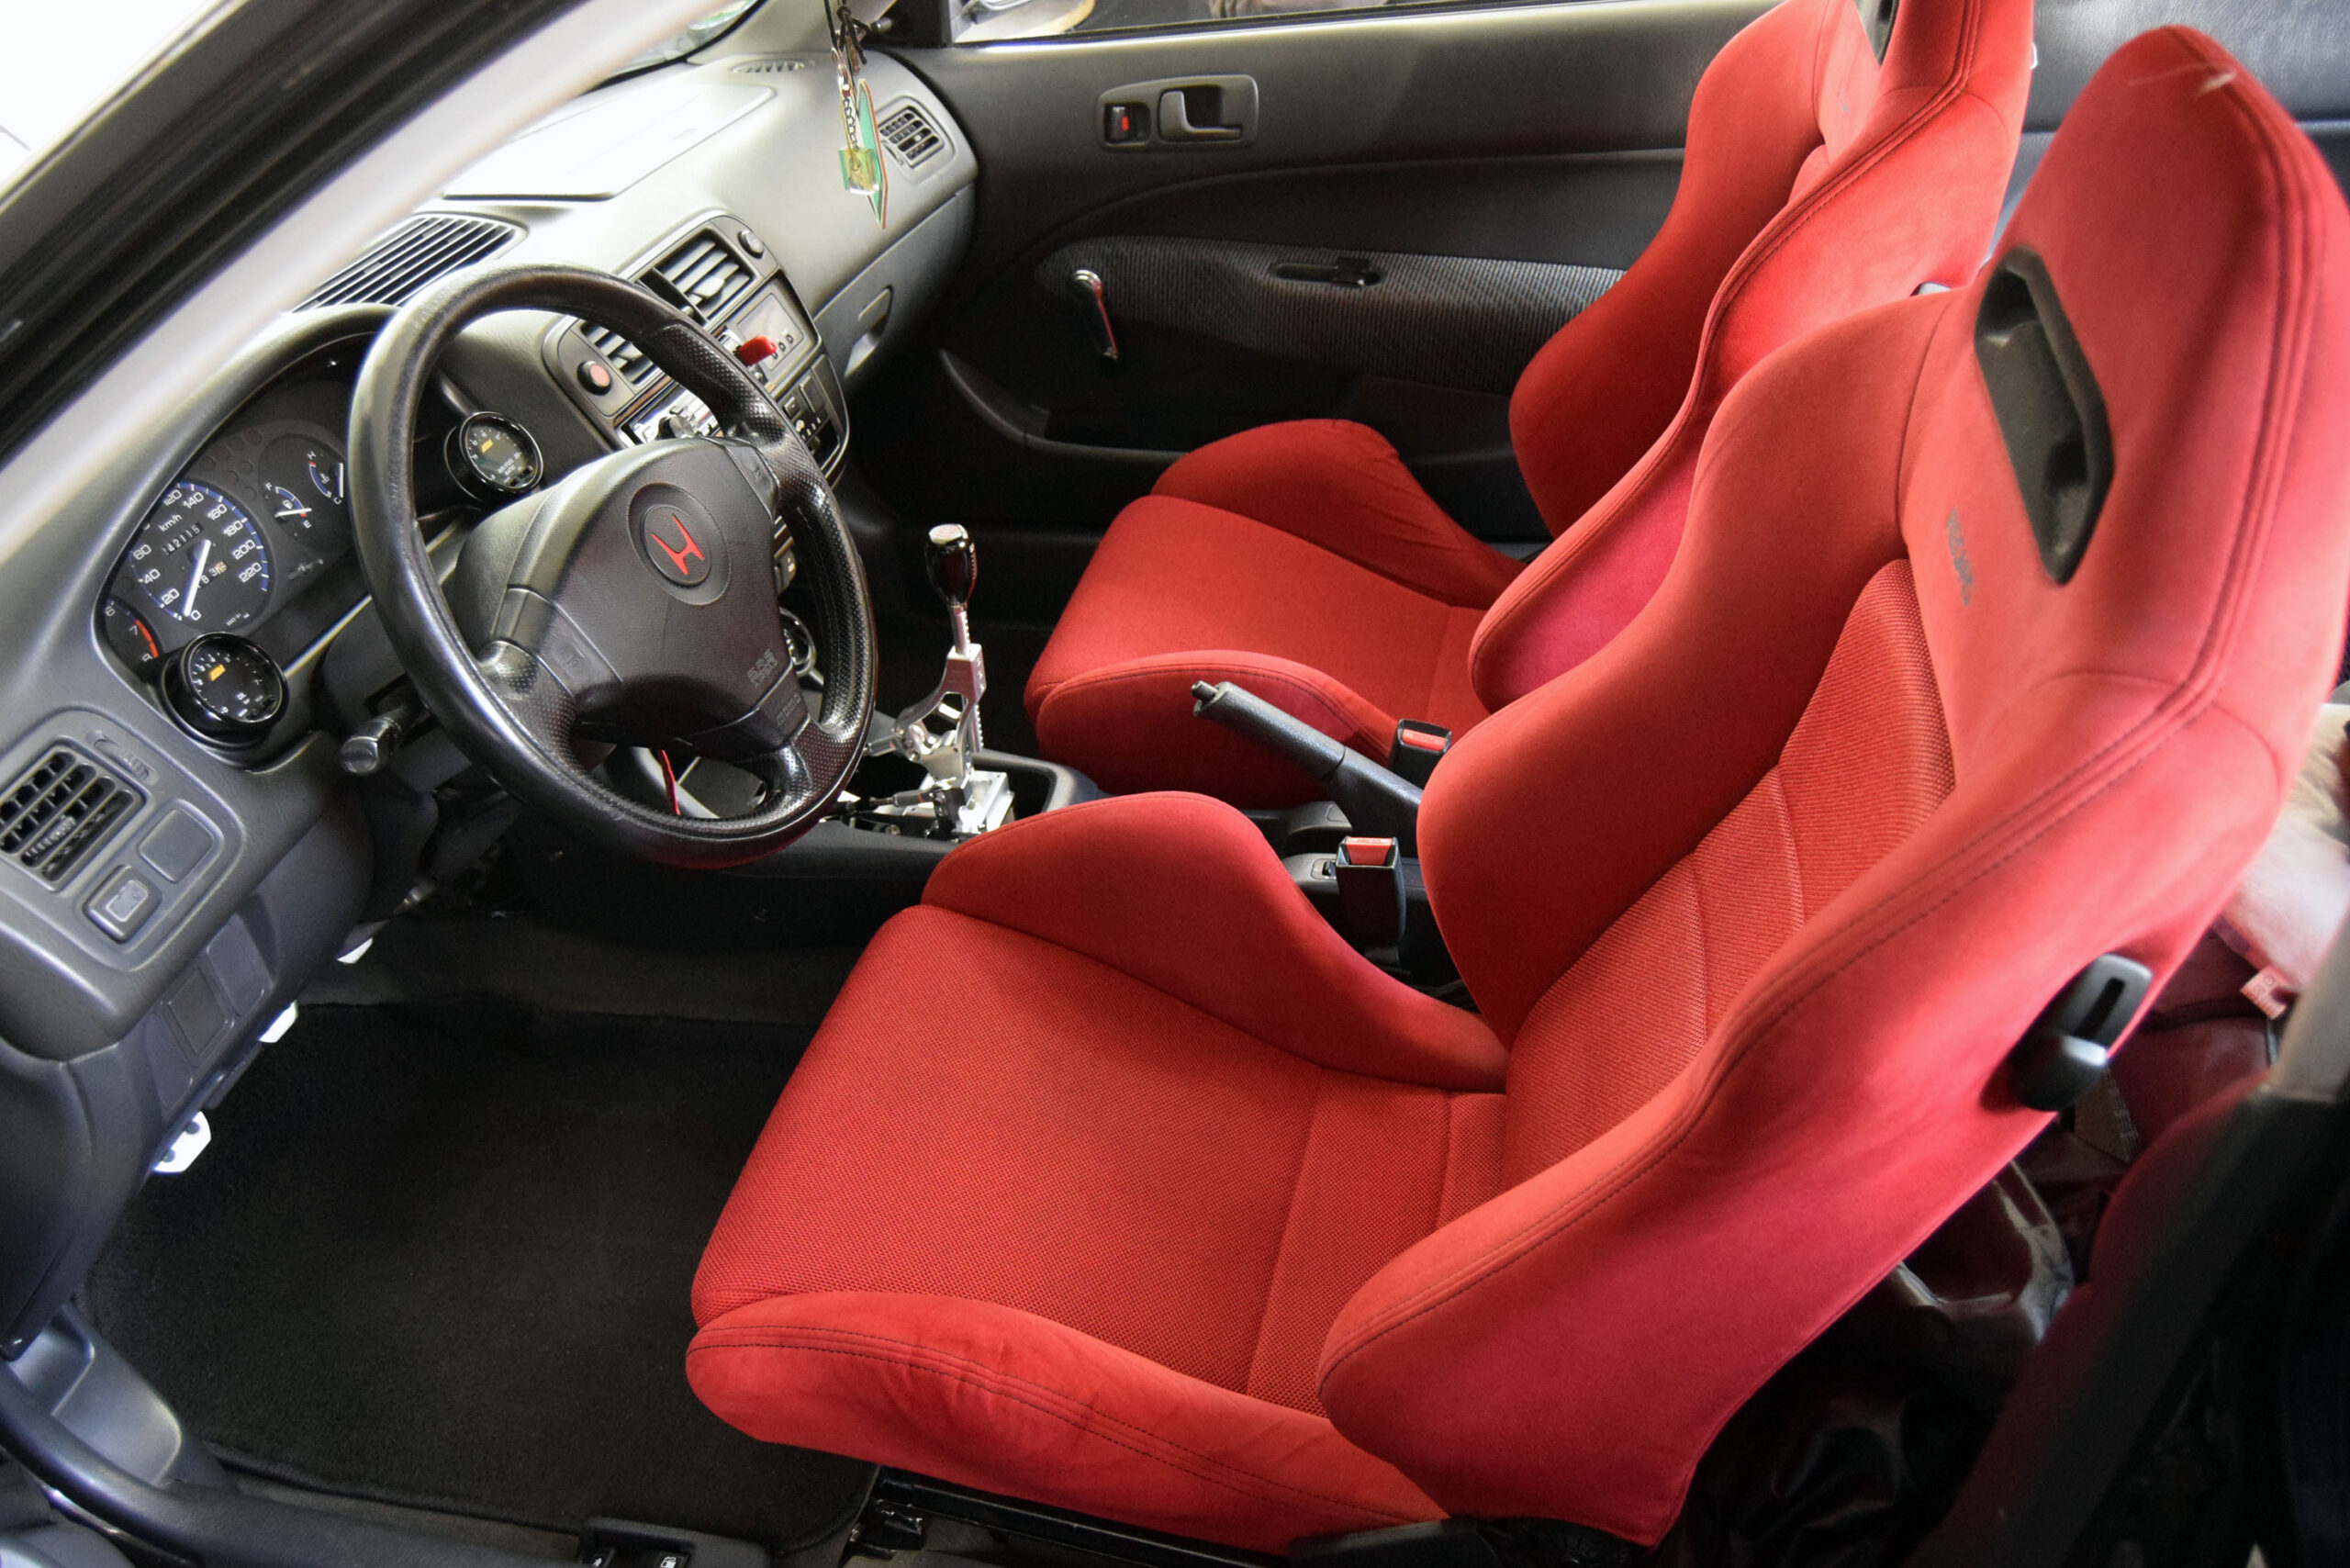
Interior wise, all eyes are on the original red EK9 Recaro seats and the Type-R steering wheel, which brought in the aesthetic DNA while preserving a street focused, clean interior.

Suspension.
While lowering springs and sport shocks are fine for cosmetic upgrades or mild use, this build needed more. The Yellowspeed Racing Dynamic Pro Sport coilover suspension gave us complete control over ride height and damping. Essentials, when it comes to setting up a car to behave well both on-road and during occasional track use.
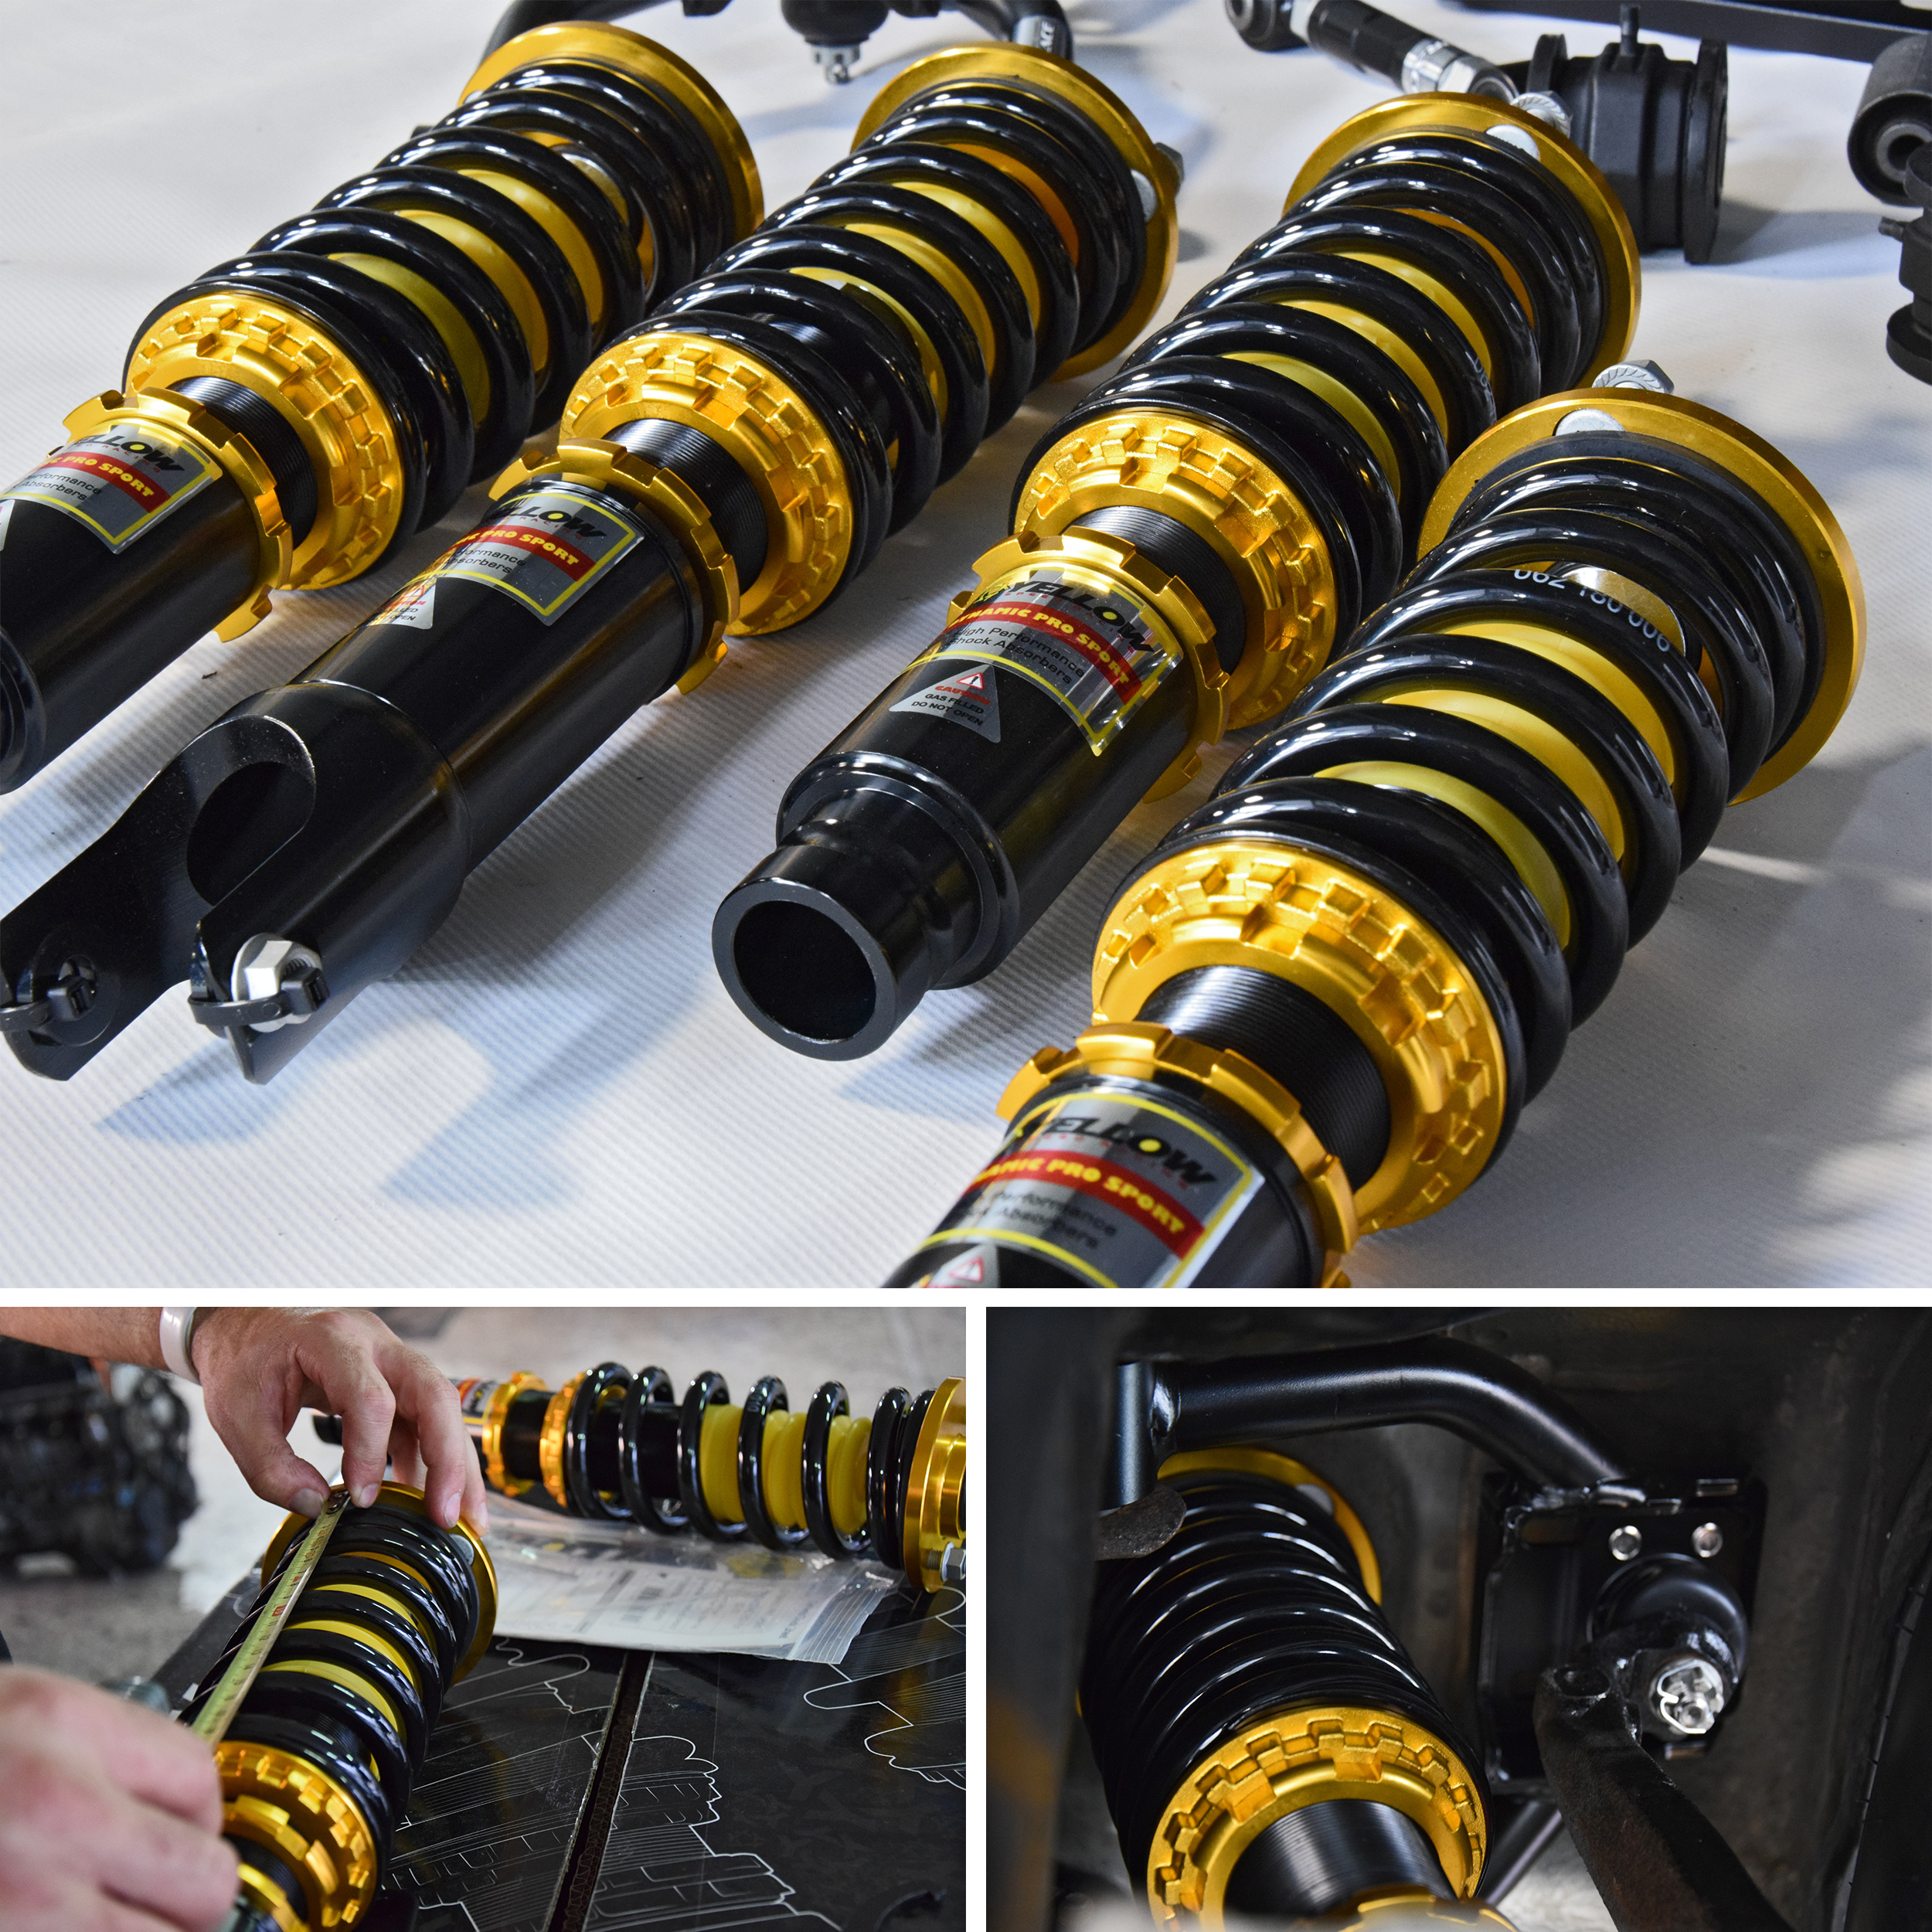
This particular kit is height and 33-way damping adjustable, making it one of the best price to performance coilovers for street setups. The monotube construction helps with heat management, while the valving offers enough support for semi-slick tires without being harsh on the street.
What About Chassis and Grip?
The control arms and bushings were replaced by using a complete lineup of Hardrace components.

We replaced all the stock, worn parts and added adjustability on key points.
Parts where stripped, metal pieces repainted , underbody was refreshed and we started fitting all the new Hardrace components. List of parts below:
Front harden rubber lower control arm bushings
Aluminum rear lower control arms
Front camber kit
Rear camber kit
Tie rods and tie rod ends
Trailing arm bushings, and more.
Hardrace is known for using harden rubber or pillowball bushings depending on application, which means better feedback and reduced deflection under load compared to OEM or polyurethane.
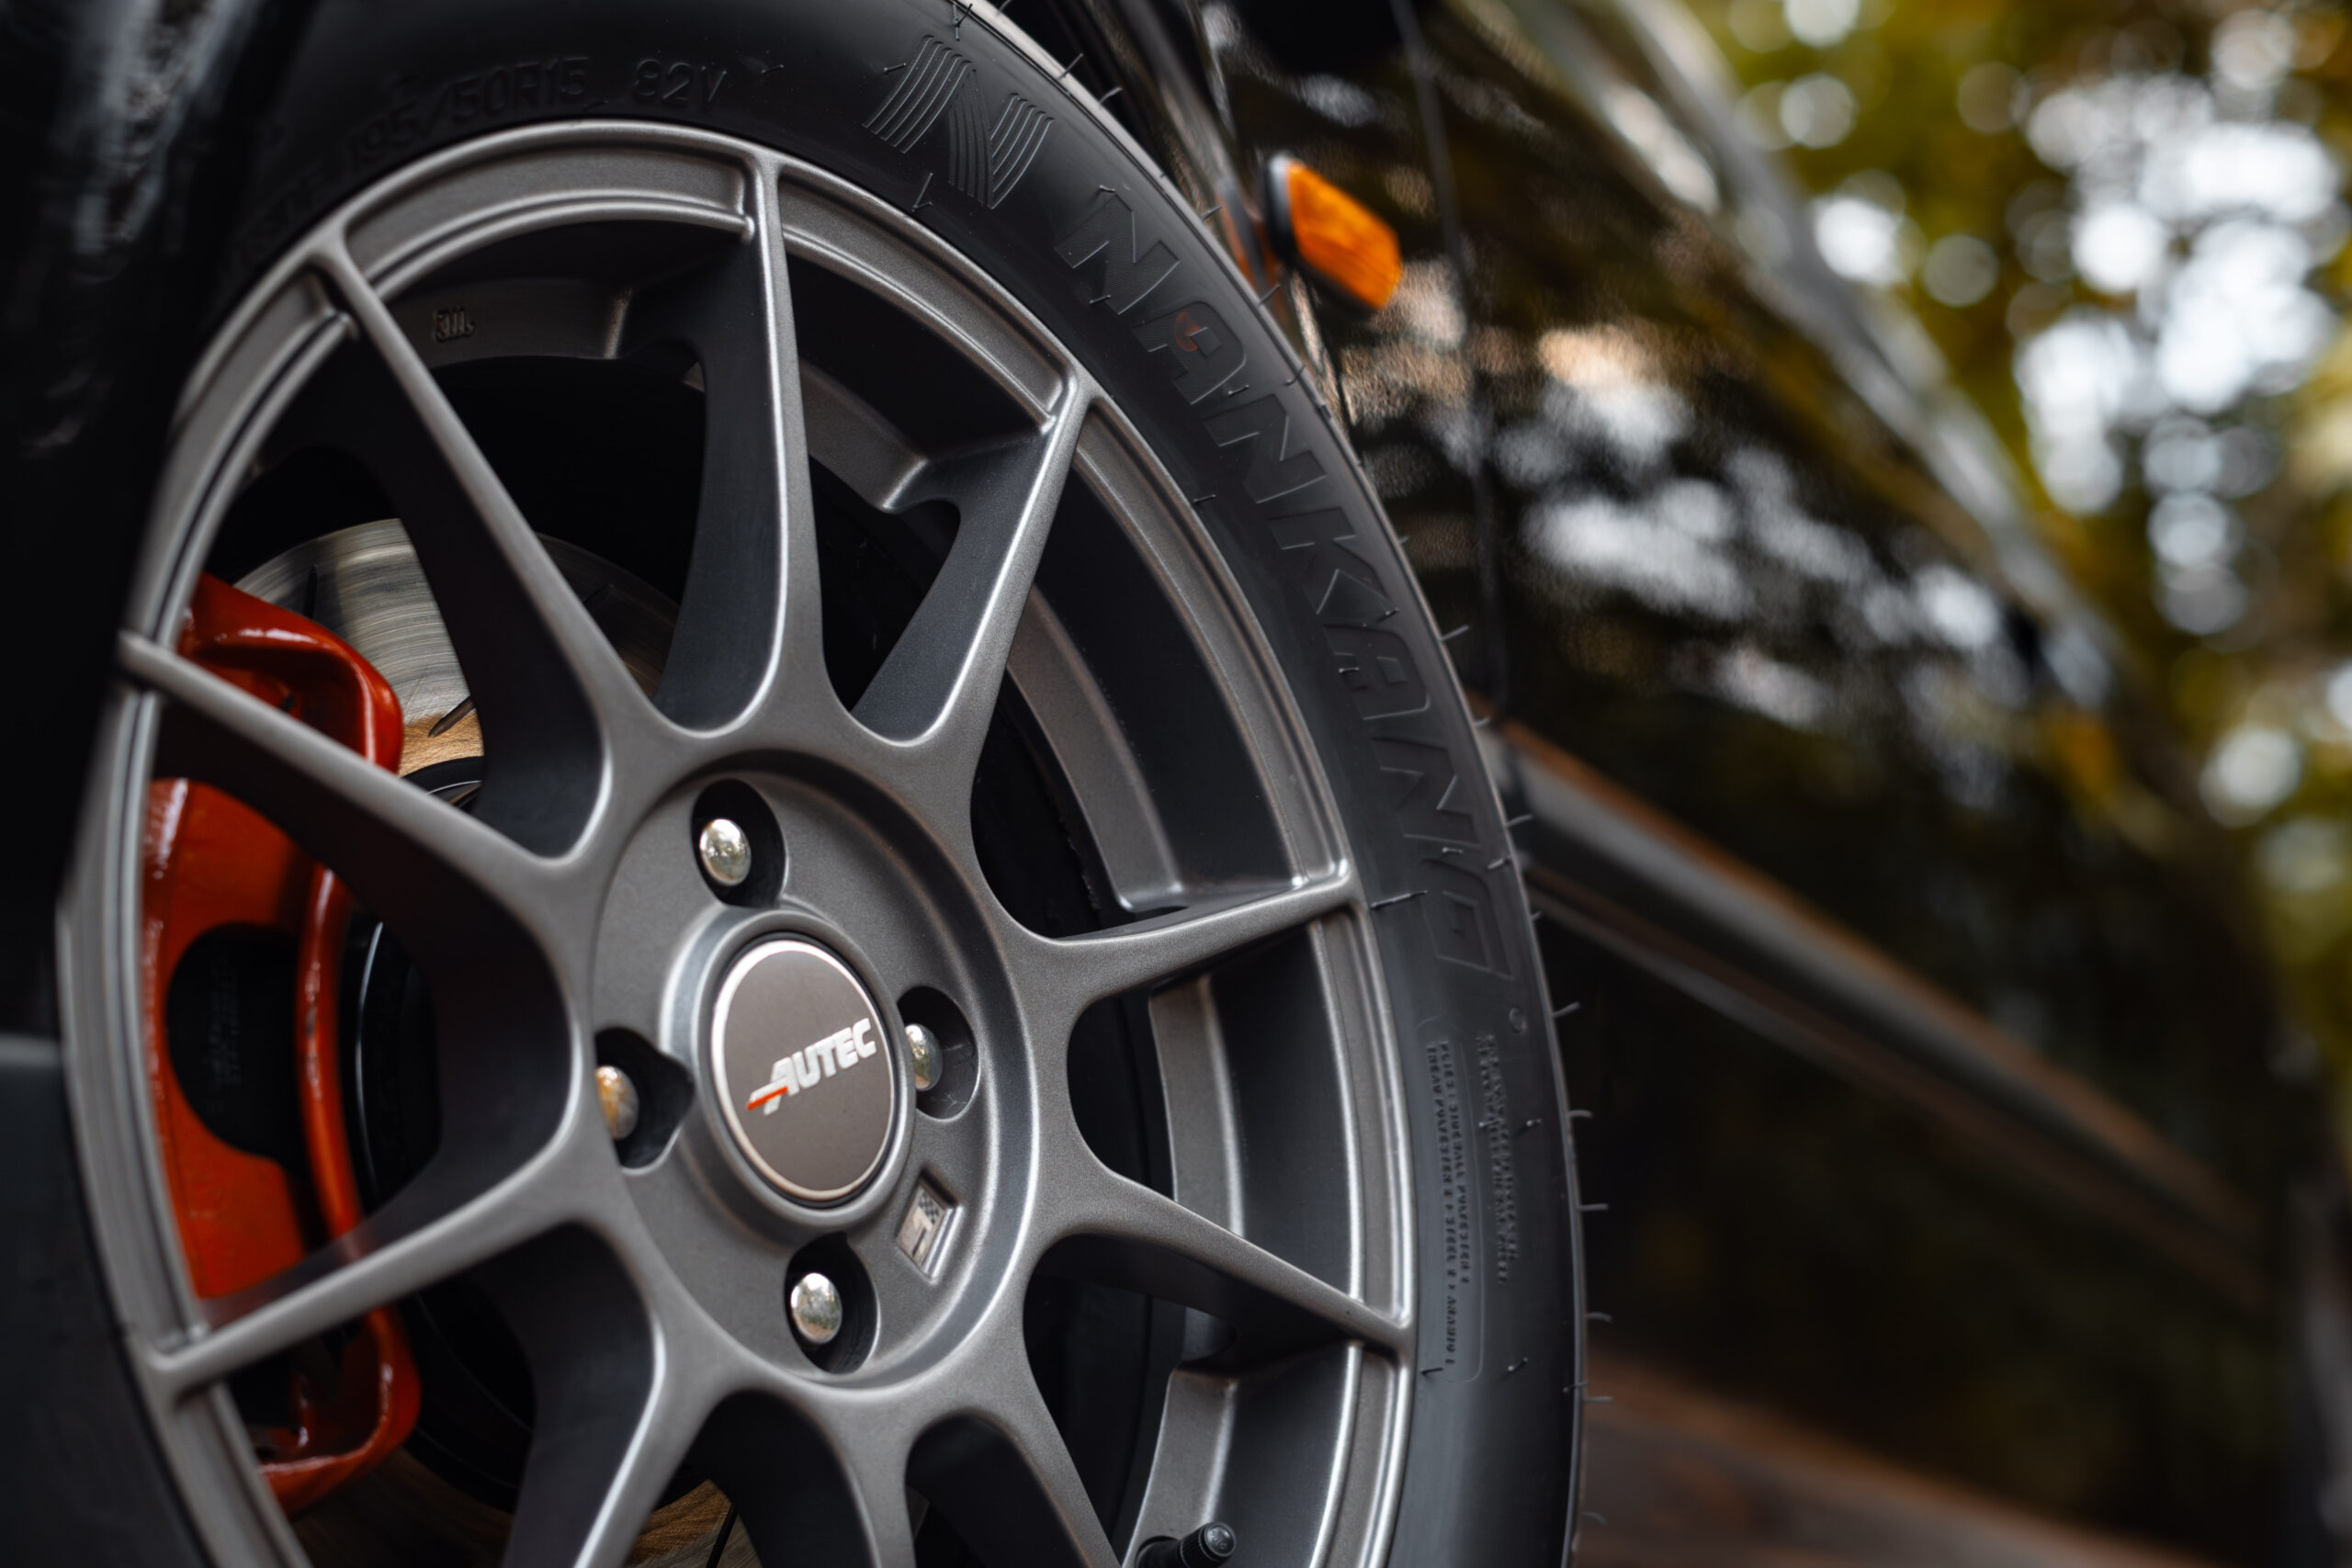
All this helped us dial in alignment and suspension geometry, eliminate unwanted play, and extract more mechanical grip. Combined with Nankang CR-S semi slicks on the 15” wheels, the EK now had front end bite, rear end stability, and the kind of confidence inspiring feedback you only get from a well sorted setup.
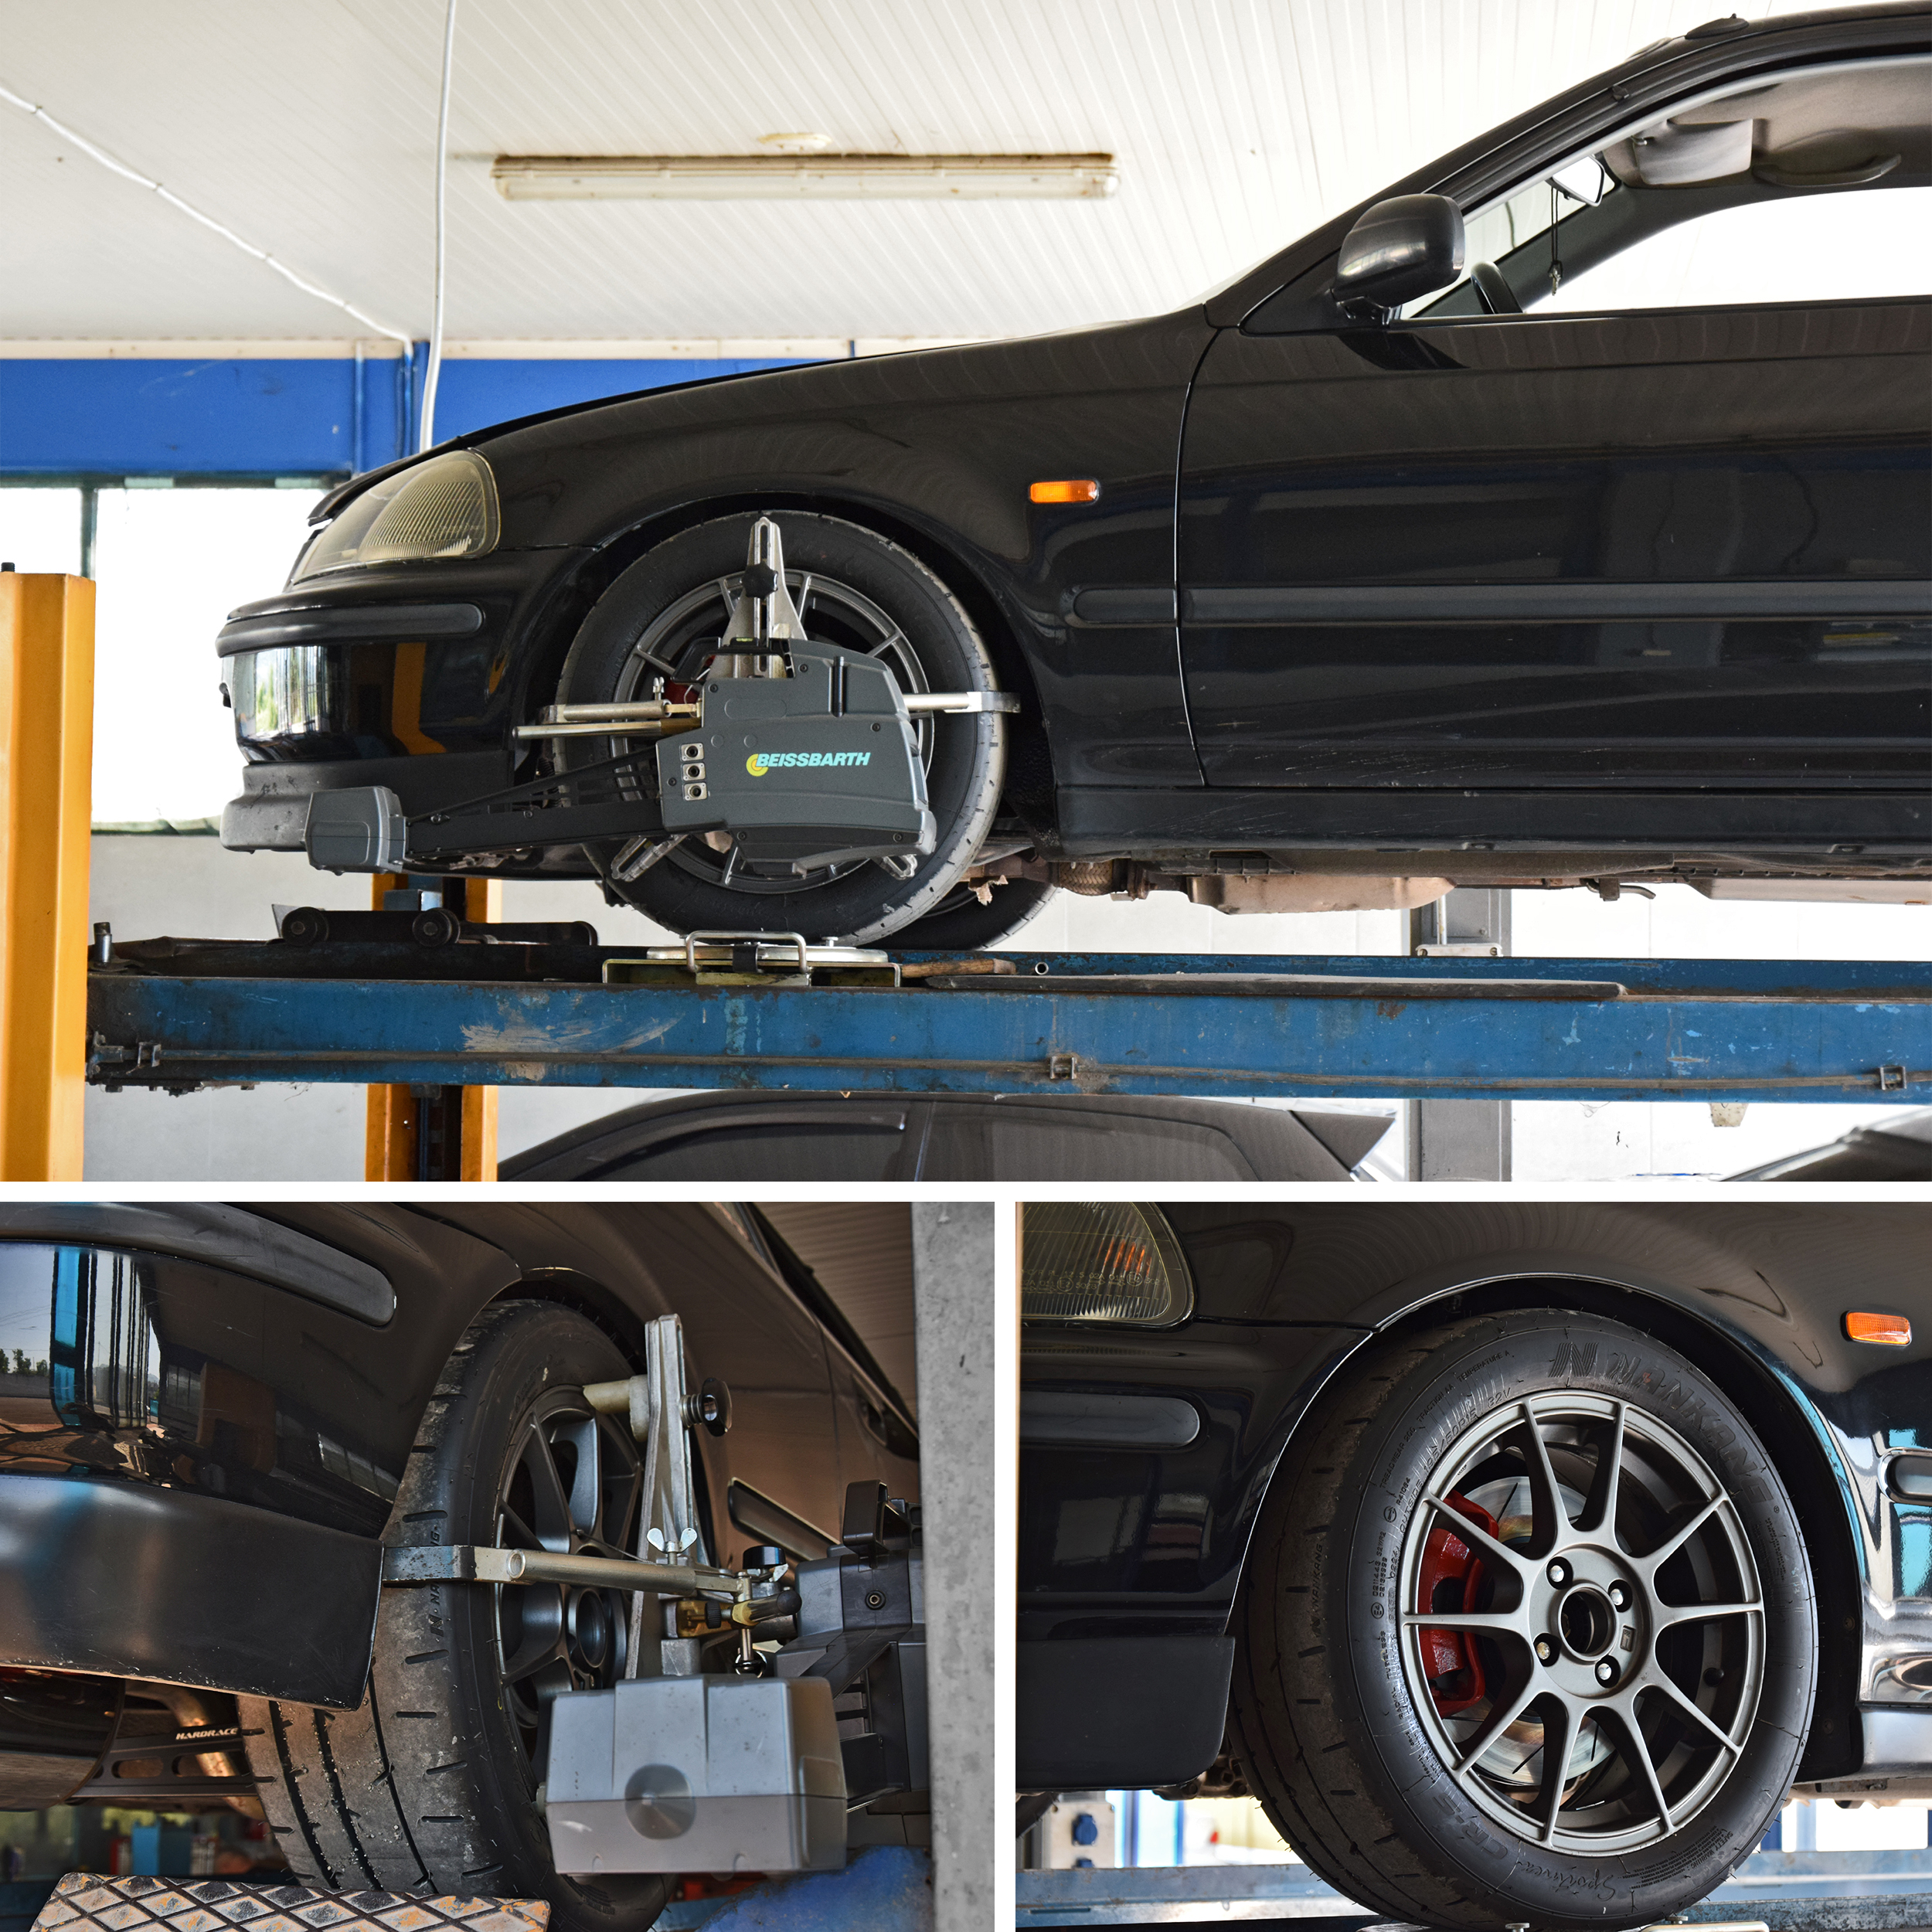
To improve the stiffness of the EK chassis, we installed the Hardrace 3-point front strut bar, while for the rear, in the trunk space, a Hardrace strut tower bar was installed.

Braking That Matches the Pace
To match the added power and grip, the braking system was overhauled with a combination of well-known solutions.
The front brake setup consists of CR-V calipers with 282mm discs (a very common brake conversion over the stock 262mm), while in the rear the car was swapped from drums to the typical VTi disc conversion with 240mm.
The old worn calipers were fully serviced and a list of performance parts took place.

Hawk Performance HP+ front brake pads and HPS rear pads where chosen to handle the brake control, matched with the RPB 282 conversion slotted rotors at front and Pagid oem at the rear. All fluids where refilled with fresh Hawk HP600 high temp fluid. Hawk pads are well-known for their linear pedal feel, consistent performance under repeated use, and low noise and dust levels. Ideal for spirited daily driving and the occasional track day.
We paired these brake upgrades with HEL braided brake lines to ensure fade resistance and optimal response during extended brake pressure.
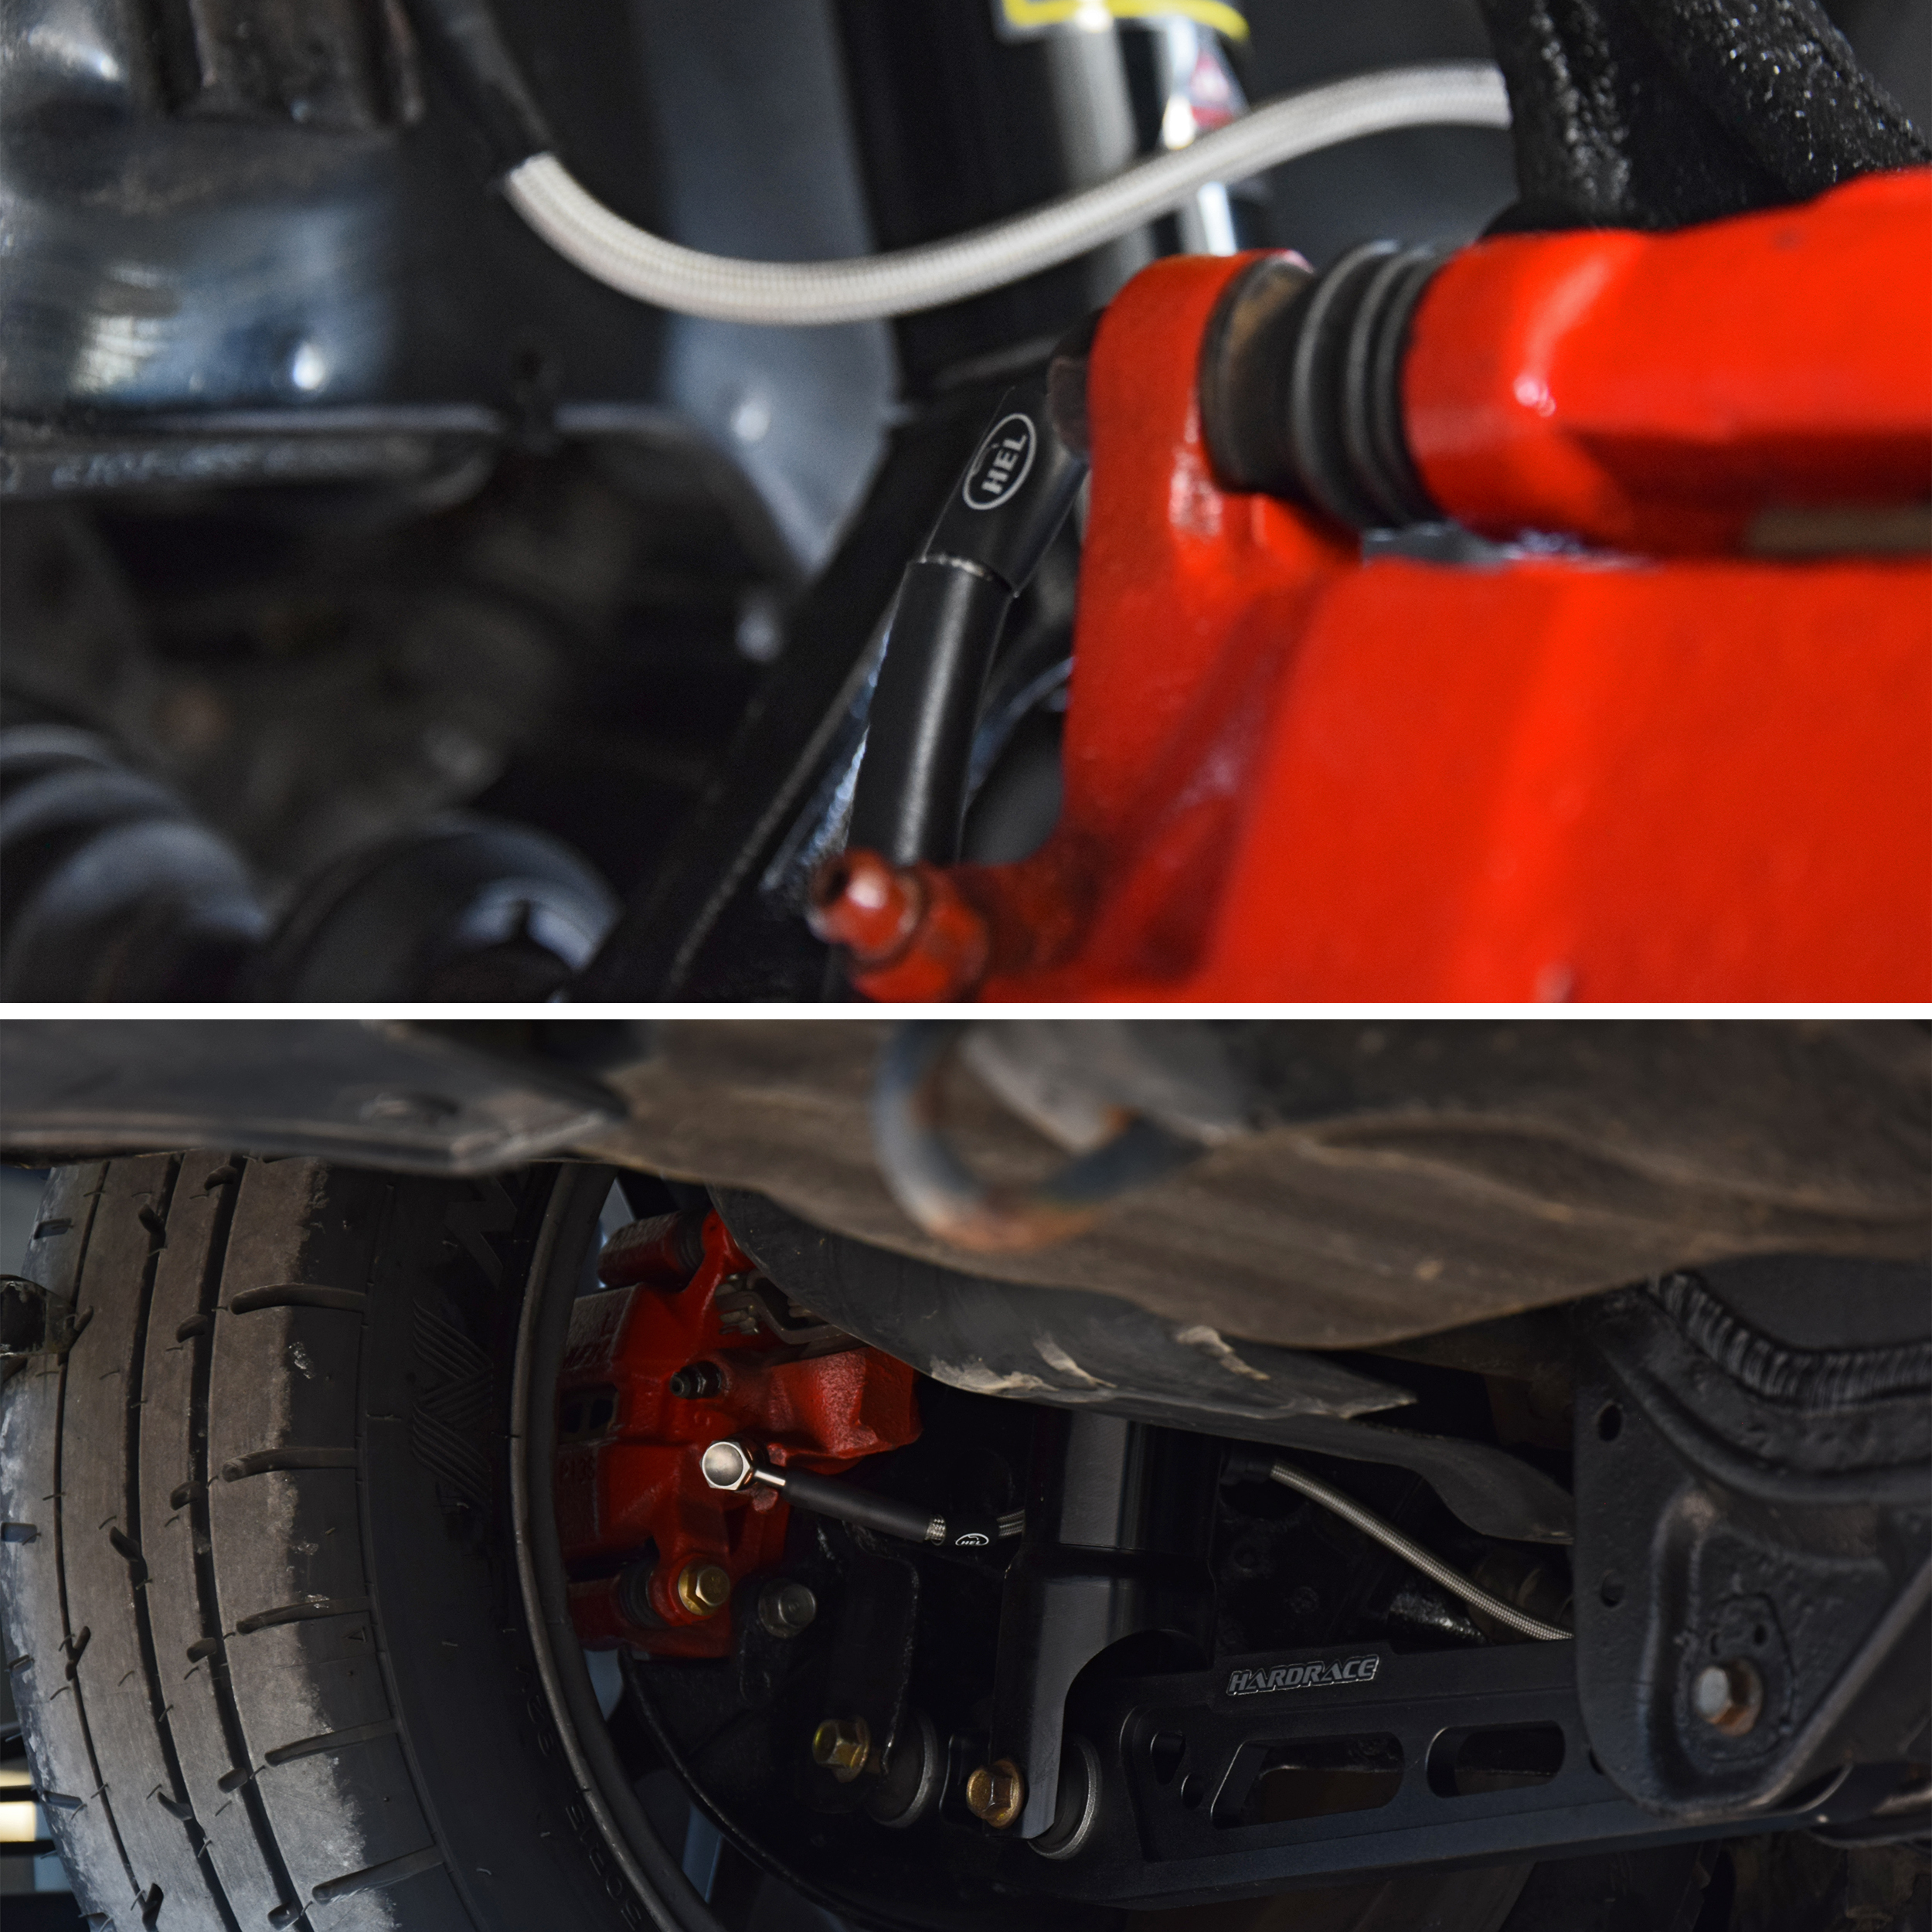
The car really started to have proper brake feel, even without the use of an ABS unit. This base model actually came without it and we kept it like that.
Electronics and Ecu. Doctronic ProECU vs Hondata KPro
Let’s be honest by getting the Honda ecus on the table. Hondata KPro is the benchmark for K-series tuning. It offers an incredibly refined software suite, real-time tuning, broad I/O support, and deep ECU-level control. For pro tuners and advanced builds with specific output and input requirements, it’s hard to beat.
That said, not every project needs the full feature set of a KPro, and that’s where Doctronic ProECU K comes in. It delivers reliable, flexible tuning for K-swapped setups at a significantly more approachable price point. It supports all the essentials: VTEC control, fuel and timing tuning, launch control, map switching, and more. Enough for most street tuned and even motorsport applications.
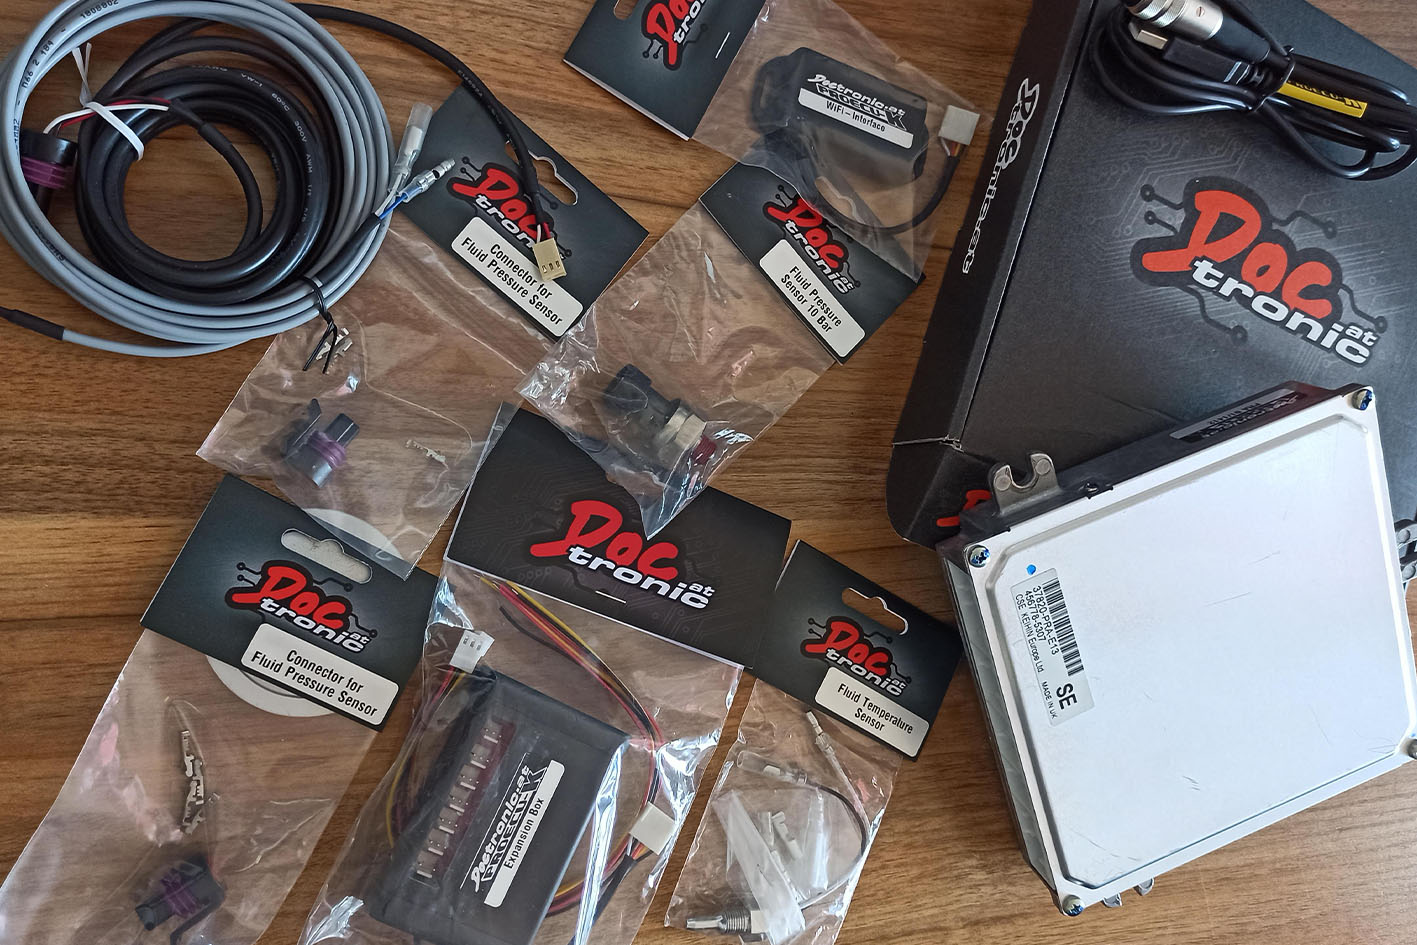
In addition, Doctronic offers expansion modules like a Wi-Fi interface for indash/monitoring, and an add-on box for extra sensor inputs, allowing users to scale their setup as their needs evolve. The tuning interface is clean and modern, though less comprehensive than Hondata’s.
ProECU K is a smart, budget friendly alternative that covers all the needs of a well rounded K-swap, especially for builders who want solid performance without overcomplicating the process.
Having our hands on the Proecu unit, we handled the ECU programming and unlocked the real potential of the K-series. Now we can clearly state this build as a functional first stage tune completed.
In order to always have a safe barrier, the addition of the AEM gauges we installed helped to further monitor -at any given time – the actual oil pressure and oil temperature of the engine. Last one on the list but of outmost importance, was the AEM wideband gauge. Better safe than sorry, as they say.


Lets go for a spin!
The first drive after a build like this is always the real test.
The steering response is the first thing you notice. The front end reacts with intention, and the chassis feels like it’s finally working as one. You point it into a corner and it follows. No drama, no second guessing. The Hardrace chassis parts, the alignment work, and the coilover setup translate into something you feel instantly through the wheel.
Then comes the engine. The K20A2 doesn’t just add power. It changes the whole personality of the car. It pulls clean down low, builds speed with ease, and then the VTEC crossover gives you that classic Honda “switch” feeling that never gets old. Not because it’s loud or exaggerated, but because it’s N/A power maker!. A naturally aspirated engine doing what it was designed to do. Revving hard, responding instantly, and making you want to stay in it just a bit longer.
The brakes complete the package. Pedal feel is firm and predictable, and the feedback is exactly what you want in a lightweight hatch. You can modulate it easily, brake deep, and trust it. That’s the kind of confidence that changes how you drive, especially when everything else around it is finally balanced.
And that’s the key word here. Balance. This Civic doesn’t feel like a project anymore. It feels like a finished car. One you can drive daily without excuses, and still enjoy properly when the road opens up. The kind of build that makes you understand why people fall in love with Hondas in the first place.
We wrapped up the project with a proper shoot on a clean roadside route, and honestly, that was the perfect way to close the chapter. Because the car finally looks the way it drives. Sharp, focused, and ready.





Is It a Track Car?
Not exactly, but it’s capable. This EK wasn’t stripped or caged, but everything from the tire compound to the brake setup was chosen with track sessions in mind. It’s the kind of car you daily, then push on a Sunday at your favorite mountain road or racetrack, and it’ll do both without compromise.
Will There Be More?
Yes. That’s how projects work. Even though it feels complete, the car has already gone through a visual transformation with a new wrap (yet to be revealed). And you know how it goes, there’s always something next.
Why This Build Matters
Because it’s realistic. Balanced. Purpose-built. It shows what’s possible when you don’t just follow trends but make decisions based on feel, function, and intent. Not everything needs to be extreme to be excellent. Sometimes, what you really want is a car that simply feels right.
If you’ve ever thought about starting your own project, this is the reminder. You don’t need to build something extreme. You need to build something that feels right. And when it does, every drive becomes the reward.
Interested in building your own Civic EK project or planning a K-swap? JDMaster can supply, support, or even manage your build.
